In our previous article on usability inspection methods, we discussed how your team can evaluate the usability of your solution, particularly in early stages of design. Evaluating your ideas further by observing users try to complete tasks in your solution is a more direct method for getting feedback, and will possibly provide the best sense of how your product will be used.
In this article we’ll give you an introduction to usability testing your wireframes and provide links to templates so that you can begin integrating this methodology in your product team.
About discount usability testing with wireframes
Usability Testing involves observing people as they try to accomplish tasks on your product guided by your instruction.
The type of testing we recommend is called discount usability testing. The idea with discount usability is that you can glean some of the most salient user insights by testing a small number of people with quick and cheap studies. Compared to formal usability studies, the discount approach uses fewer resources and takes less time, therefore allowing you to iterate and test more often.
Jakob Nielsen popularized the idea that you can conduct simple studies on early product models like wireframes with as little as 5 users and identify the major usability flaws that may lead to users failing with your website or app. If you can source more than 5 users, it is recommended that you allocate those additional users across many small studies to test more design iterations, rather than adding more users to one study.
The goal of testing with users is generally to uncover usability issues and faulty assumptions in your design by observing how users actually behave in your product, and learning about their expectations and preferences.
Advantages of testing with wireframes rather than high fidelity prototypes or developed products
- Cost-effectiveness — wireframe prototypes are inexpensive to produce and iterate on quickly
- Early evaluation — testing can be done earlier, when it’s less costly to find and fix problems
- More frequent evaluation — you’re likely to perform tests more often because of speed and cost-effectiveness
How do you test your wireframes?
Usability testing can be broken into several phases. The Usability Body of Knowledge provides a high-level overview of the steps for preparing, executing tests, and presenting insights and recommendations.
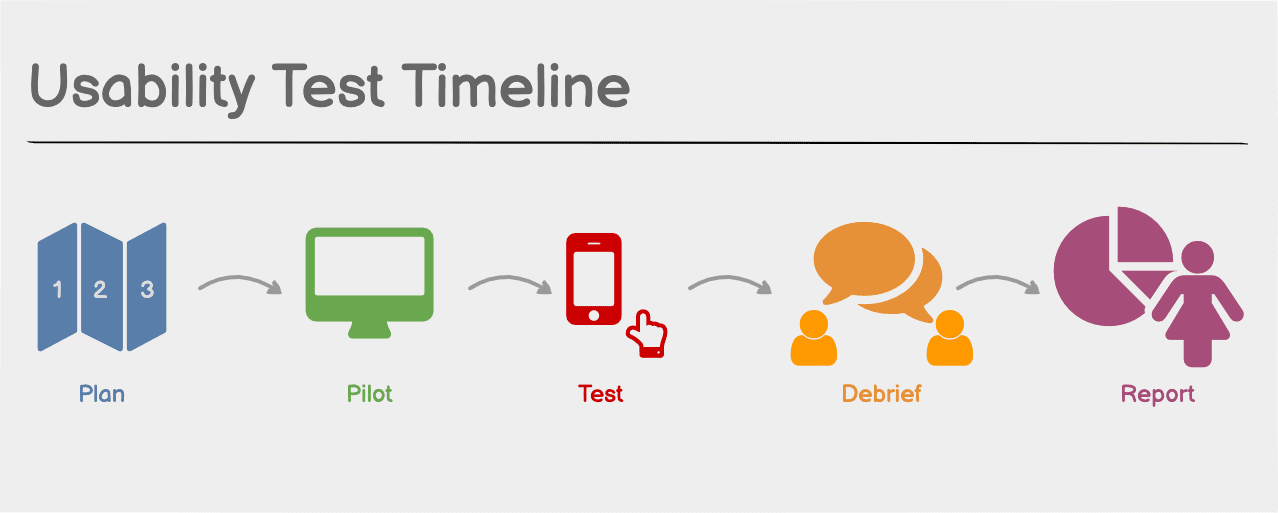
Phases of a usability test:
- Planning
- Pilot study
- Test sessions
- Debrief
- Analysis, interpretation, and presentation of the results
We’re going to break each of these down further next, following the steps we take on our own usability test process at Balsamiq.
Planning
Proper planning is important for testing. Writing a usability test plan is the first step in the process.
While it can seem daunting, we like to start planning using forms and templates that we’ve gathered from the usability research field. We use a test brief that helps us state the scope and purpose of the test, describe the logistics and schedule, and define our team and recruiting plan. To state this more simply, we list the who, what, where, and how of what we’re testing.
Usability test plan brief
1. What will we test? (Scope)
- What user goals are within the scope of this test?
- What are the tasks associated with completing those goals?
- What are the scenarios or actions we expect a user to take to complete each task (describe them in detail)?
- What wireframes will be used to provide the screens for the scenarios to be tested? These can be static documents (for first impression tests) or linked wireframe prototypes (for tests where users will interact with the interface to complete a task).
Note: The answers to these questions help you create the test script.
2. Why are we testing? (Purpose)
- What are the objectives?
- What is the team most worried about?
- What type of user worries us the most?
- What assumptions do we have?
- What tasks would we like to see the user performing?
3. How and when will you conduct tests? (Logistics, Schedule, Equipment)
- In-person (conducted physically in person) or remote (conducted online)?
- Moderated (will we be present in real-time) or unmoderated (will participants complete the test on their own without the need for our presence)?
- What equipment will be used?
Note: This will also determine what tools and services you may need to investigate and pay for.
4. Who is on the test team? (Roles)
- Facilitator who will moderate the test sessions. For us, this is often the person who will lead the project.
- Note taker who will note what each user does and records how the user performs (e.g. succeeds or fails at task).
- Observers (optional). Bringing in at least part of the team to observe tests may save time and effort in debriefing, reporting, and sharing the results later.
5. Who will be our test participants? (Recruiting)
- Who are the type of users you want to observe? (You can use design personas or Jobs to Be Done profiles that describe your users.)
- Will we recruit people on our own or use a recruiting service? (Some services are available to handle recruiting for a fee. See more info about recruiting at NN/g.)
- How will we screen people to find appropriate participants? (Learn how to use screening to recruit appropriate participants.)
- What documents do we need to provide for consent? (Consent forms are necessary if you plan to record sessions. You can simply use one of Usability.gov’s Consent Forms for Remote Usability Test.)
- What incentives will we offer for participation? (A person’s time is valuable. You may want to compensate participants for their time. See NN/g’s thoughts about incentives.)
Note: This leads to your recruiting plan and screener.
Start from templates
There are formal templates to prepare your test plan. Usability.gov has provided usability testing templates you can download for MS Word. Some of the files you may want to start with are the Test plan and Screener. There are a few different consent forms for specific use cases, so you may want to browse the template directory for those.
All of our testing at Balsamiq is done remotely. We do both moderated and unmoderated testing, so the planning and messaging depends on how we do a particular test.
Prepare your test script
The test script will provide the basic instructions that you’ll give test participants. It also provides you with a procedure for running each test identically. You will prepare your introduction, pre-test questionnaire, guided task instructions, and post-test questionnaire in one script. You’ll follow the same sequence for each participant.
Write task scenarios and list prototype requirements
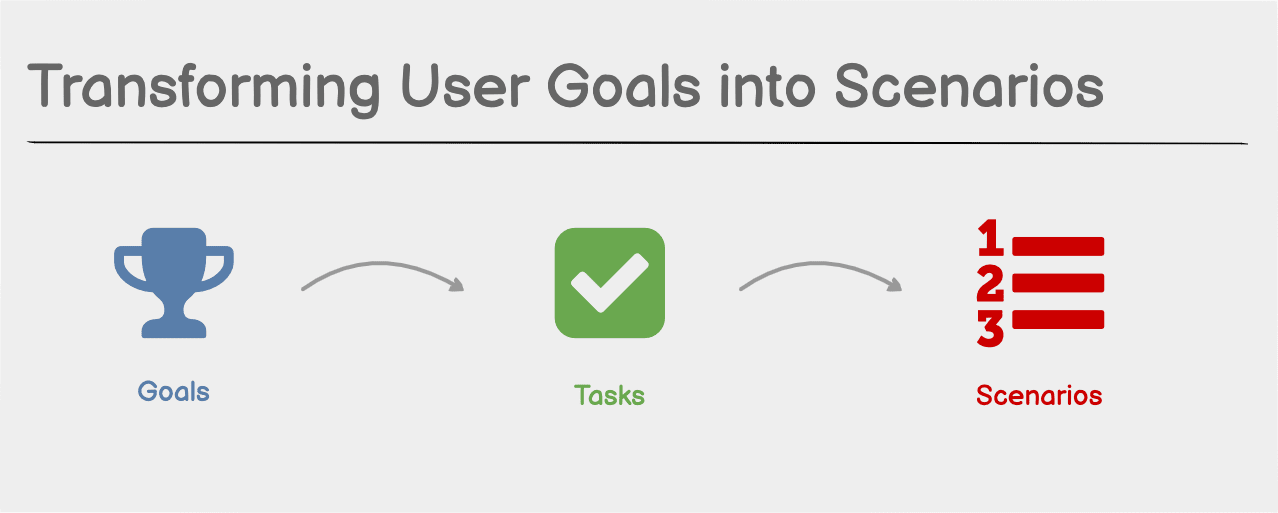
Perhaps the most important aspect of planning the test is defining the tasks and writing your script. From the What portion of your test plan, you should have explored the goals you’d like participants to accomplish in the product. Then define the tasks to perform in terms of goals. Finally describe the scenario for task completion as a set of actions you expect the user to take.
As you think about the tasks you want to observe the user performing, remember that the important things you want to study are those that correlate with them achieving goals with your product. So a usability test is less concerned with observing the user’s performance on common patterns like, “How do I log in to the system” or observing aspects related to marketing concerns like “How do the colors in this design make you feel.” Focus on the types of activities that the user will perform to accomplish goals on the product. Those are the areas you want to evaluate for usability.
Begin listing each of the tasks in your Test Script. Here’s an example of a goal and scenario that you expect for a user. We’ll come up with a concrete task that helps the user achieve that goal.
- Goal: Find and buy a product.
- Scenario: Starting from the home page of the site, the user will browse or search and find a product. They will review it to see if it matches their search criteria and add it to their cart. Afterward, they’ll begin the checkout process.
- Task: Buy a pair of trail running shoes for under $100.
See the NN/g article on how to turn goals into task scenarios for more tips on this topic.
The scenarios give you an inventory of screens and functions that should be provided in the prototype. By walking through the possible ways for the user to complete a task, you know what to include in your prototype. Begin to identify if your wireframes cover the scenario and use the linking feature to link screens together.

Prepare questionnaires
We’ve provided some basic pre-test and post-test questionnaires as examples in our script template found below. You will want to customize the questions to reflect what you want to learn about the participant before the test, and get follow-up information following the test.
Generally the pre-test questions look for information about the participants' experience with the product. You might ask if the person has used the product before, how much experience they have with this or a similar product, what similar products have they used, and what their favorite aspects of the product are.
The post-test survey tends to be an opportunity to probe the participant further, and offer them an opportunity to give feedback that they may not have expressed while performing tasks. We tend to ask open-ended questions about how the participant felt using the product, what their overall impression of the experience was, and if they have any thoughts about things that could have been better. You can also use this time to follow up on questions outside of the scope of the tasks that the participant may have had, if necessary.
Start with a template
Writing the script might seem like a daunting task. Again, this is where a template will help. You can easily copy the structure of a template to get started formatting your own script, and as mentioned earlier, there are usability test script templates available on the web.
Pre-test or pilot study
By now you have a good idea of how the test sessions will proceed. When your script is fully complete and has been reviewed by the participants from your team, it’s time to test the test.
You should run a pilot study using an internal team member as a participant. This should help you evaluate the test script and identify any issues before running the test with actual users.
We’ve found that it helps to organize every aspect of the in-house pre-test just as we would do on the actual test with users. We have occasionally missed a detail like a typo in an invitation email or found that a screen was missing from our prototype.
What to do in a pilot study:
- Set up your testing environment
- Test the email messages for the screening process
- If you are doing remote unmoderated tests, test the invitation from the tool
- Conduct the test with the dummy participant, including the note taker
- Test your questionnaires
We find that during dry runs there is always something that can be refined. You want to prepare as much as possible, but it’s the nature of testing that dead ends will be reached and unpredicted behaviors will happen. This is not a bad thing — in fact it’s what you’re trying to uncover. But prepare as best as you can using your scenarios as your guide.
The test session

Introduction and instruction
Start off the session by introducing yourself and the team members and taking the time to formally welcome and thank your user for their participation.
This is also the time when you’ll ask the user for their consent to record the session for internal use, and if there is sensitive information that you will be presenting you may ask the user to sign a non-disclosure agreement at this time.
The last thing we do is provide an overview of what’s about to happen. We’ll give a brief reminder of what we’re testing and some instructions. For instance, we’ll remind them that we’re evaluating the product and this is not a test of their ability. We’ll remind them that they can’t hurt our feelings and that their honest feedback will really help us to improve the product. We also want to instruct them to think out loud as they’re attempting to complete tasks.
Pre-test interview
With the introduction out of the way, you can warm up by starting off with the pre-test interview. I see this as a good ice breaker because it gives the participant the chance to answer some easy questions and talk about themself. I find that a lot of people like talking about themselves and that this might almost give them a sense of confidence.
You will of course ask questions that are pertinent to your test, but use this moment as an opportunity to ease the user into the process. Just be aware that some people take more time answering these questions than others. Remember to keep to a schedule and limit the time here so that you have enough time for the main event — testing!
Begin tasks
Now you can get to the test. Each task should give the user some context if necessary, setting up the scenario.
Assign the task
Using the shoe buying example above, you might start by presenting the homepage of an e-commerce site prototype. If you’re interested in first impressions, you might ask the user to describe what they see, or you could go directly to introducing the task, reminding the user to think out loud:
Starting from this screen, we’d like you to buy a pair of running shoes for under $100.
While the user is attempting to complete the task, allow them to process and make mistakes.
If the user gets stuck
During the process, there may be many points where the user gets stuck or asks for information. Your role is to provide information without influencing their behavior. You may need to repeat or clarify the task, but don’t provide more information than what the user can discover on their own by reading the screen.
If they seem thoughtful or stuck, you might remind them again to “think out loud,” saying something like “I notice that you’re looking around at the screen. Would you be willing to share what you’re thinking out loud to us as you’re looking?” While they’re thinking out loud, you might repeat their question back to them, or just refocus them on the task. They might simply need time to think about what they’re seeing. Make them feel comforted that there is no right or wrong feedback and that they can just try whatever ideas come naturally to them to do the task.
Here’s an example showing a usability test session where a facilitator asks a participant to complete a task. The example shows how the facilitator gives instructions and responds to the participant without providing information to influence their behavior.
Note that if you're doing an unmoderated remote test, the type of tasks you might give the user would probably need to be scripted more granularly so that each interaction or each user thought can be observed. This is important with unmoderated tests because users cannot seek support including asking for clarification if tasks are not clear.
Note taking
During the task, your note taker may be making observations or capturing salient comments from the user. It’s a good idea for the note taker to also mark the time associated with these events so you can re-watch the recording afterward. For each issue they note, they should mark it using a descriptive system like categories or tags, so that common issues across sessions can be collected. These notes will help in the analysis of the sessions.
The note taker will also be tracking data about whether the user succeeds or fails to complete the task.
There are dedicated tools for note taking and video capture during moderated tests. You can also just use screen recording software like Screenflow or record in Zoom and capture notes in a spreadsheet, as we do.
Post-test interview
When you’re satisfied that the user’s attempt to complete the task has come to an end, you may now stop to talk about what just happened in the session. You might ask them to rate the difficulty of completing the task on an ordinal scale (1 easy to 5 difficult, for example).
Lastly, you will want to try to ask some probing questions to learn more about what the user was thinking while completing a task. For some great examples of how to approach this line of questioning, check out this article by NN/g about asking questions to get better insights. When asking questions, try not to influence the user by implying the desired answer, but do spend the time to dig a little deeper.
Thanking the user
After all of the questions are complete, you have a final chance to let the participant give you any last bits of feedback about anything they recall from the test. They may have questions at this point, which you may answer more freely, and they may have some final thoughts to share. You can thank them and end the test.
Debrief
In the debrief, the facilitator, note taker, and observer take the time to meet after a session. This is a good time to discuss some issues that are top of mind and begin to clarify or ask questions about anything they observed. The note taker’s notes can help to refresh and recall what happened, and you can improve the notes as a team while the session is still fresh in your mind.
Analysis, interpretation, and presentation of the results
The final step is to analyze the results of all of your sessions. You can begin by thinking of these tasks:
- Gathering all of your notes data into a single system
- Analyzing your categories and tags and looking for patterns
- Identifying issues by severity or priority
By analyzing the patterns that emerge from failed tasks, or clusters of difficulty or problem areas, you can begin to prioritize the usability issues by severity. These types of usability tests should not focus so much on the quantitative data, but are meant to uncover problems. With the analysis done, you can start to create a presentation.
What to include in the presentation
- Describe the scope, methodology, and participants in an executive summary
- Summarize the findings
- Present a categorized list of issues for areas where users had difficulty completing tasks
- Show issues categorized by severity
- Suggest usability recommendations
It is often valuable to let your team see users struggle with a feature and then describe their difficulty. With each area of difficulty, you may dedicate a slide in the presentation on the issue and include a video clip of an example for the team to observe.
Lastly, gather up your product team to present the results. This should provide enough information to lead a discussion about your recommendations and how to proceed with next steps, like iterating the design for another round of ideas and evaluations.
Final thoughts
The idea with discount testing is that you can uncover the major flaws and drive substantial improvements with a very small budget. Following each test and design iteration, you can return to your usability inspection techniques like heuristic evaluation and repeat the process.
Usability testing is a powerful methodology for evaluating product ideas. When testing with wireframes you won’t have to wait until your product is fully functional to evaluate your design. Observing real people trying your product using wireframes is an effective and cost-saving step in validating design ideas. It’s not that difficult to do in-house, and you’ll find that you don’t need to be usability research experts to get a lot of value out of doing them yourself.
We hope you’ll find these usability evaluation methodologies easy to learn and see the value in integrating them into your design process. We can only begin to touch on usability testing. You will find a treasure trove of resources for perfecting this craft in Usability.gov’s Usability Evaluation resources, the UXPA’s Usability Body of Knowledge articles on Usability Testing and in the Nielsen Norman Group’s many articles on User Testing.