People and permissions
On this page
Space permissions
Balsamiq Cloud has four user permission levels: Space Owners, Staff Members, Guest Members, and Billing Admins.
Space Owners
Space Owners are the admins for the entire Balsamiq Cloud Space. They can:
- Access any project on the Space
- Create new projects
- Add Staff and Guest Members to any project on the Space
- Manage all the Space Settings
- Select a Billing Admin
The default Space Owner is the Space's creator, but you can add a second Space Owner, which can be great for sharing the administrative load.
Note: You can transfer the Space ownership to someone else by removing yourself from the "Owner" role once you have designated a second Space Owner.
Staff members
Staff members are project administrators for any project they have access to. They can:
- Create new projects
- Own projects
- Invite project members to projects they own
- Access the list of all users on the Space
Guest members
Guest Members only have access to projects they are a part of, and cannot invite (or access the list of) other members of the Space. There are two kinds of Guest Members:
- Those who can edit projects
- Those who can only view and comment on projects
Billing Admins
Billing Admins can manage the billing section of a Space. They can:
- Subscribe to a plan
- Change plans and billing info
- Purchase AI Credit top-ups
- Cancel a subscription
Billing Admins ONLY have access to the Billing Settings of the Space. They will not be able to participate in projects, or even access them at all (unless they're also a member of the Space).
Note: This is useful if you want a reseller - or someone from your purchasing team - to be able to manage your Space's billing without actively participating.
Making someone a Billing Admin
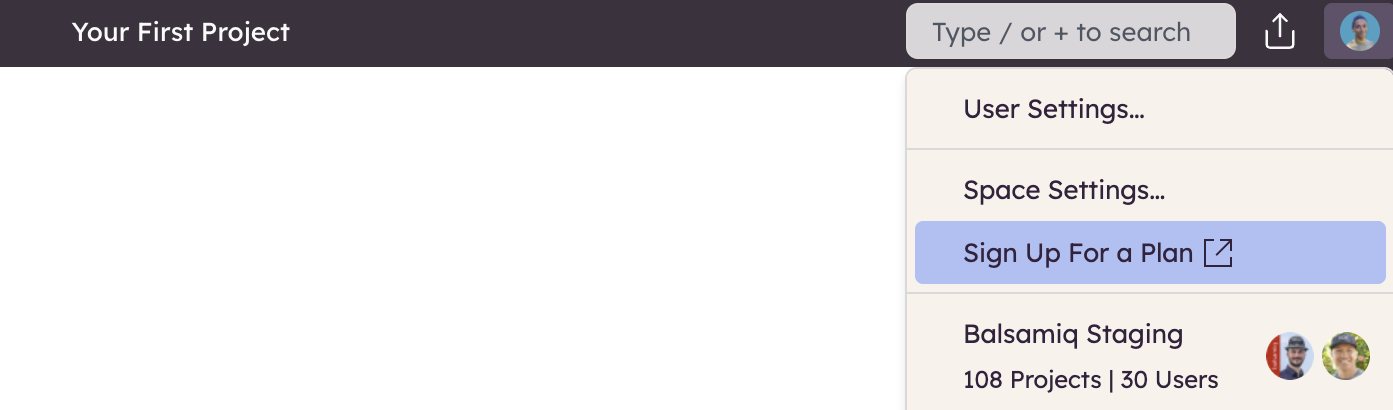
Space Owners can select a Billing Admin by clicking on the Subscribe button, or Sign Up For a Plan (or Manage Subscription if you already signed up for a plan) from the Avatar Menu in the upper-right corner.
Under the Billing Administrator section, select one of the three options: myself, a member of this Space, or an external email address.
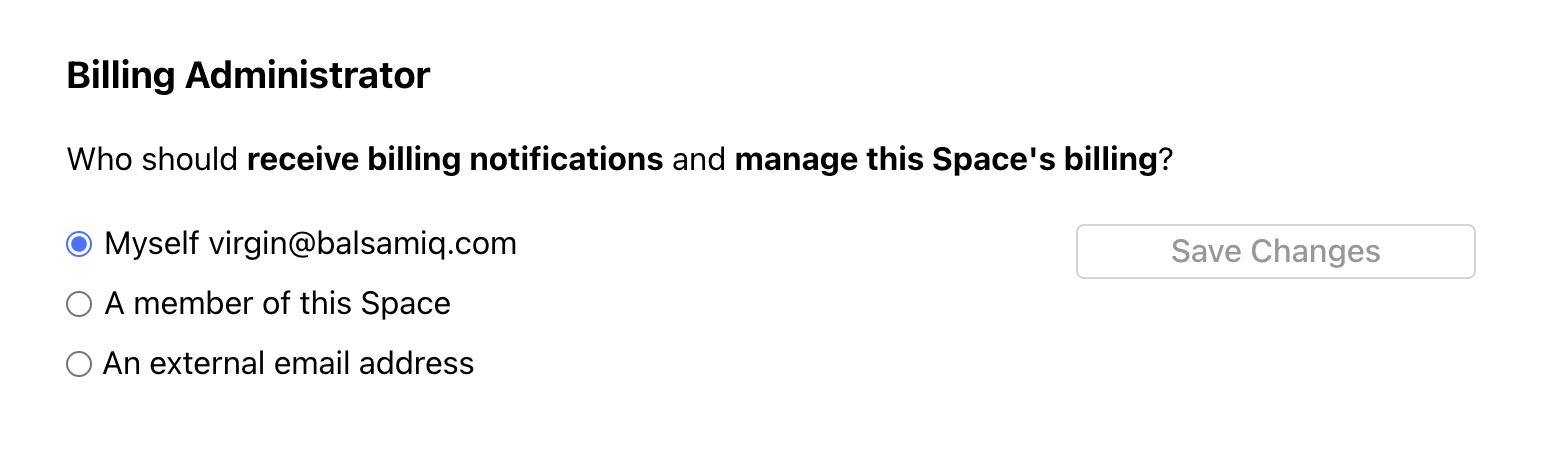
For a member of this Space, select the desired Space member from the drop-down list.
For an external email address, enter the email address of the person you’d like to invite, and then click "Save changes" and “Email them a link to this billing page” to share the public link to the billing page.
Project permissions
Managing user permissions on projects
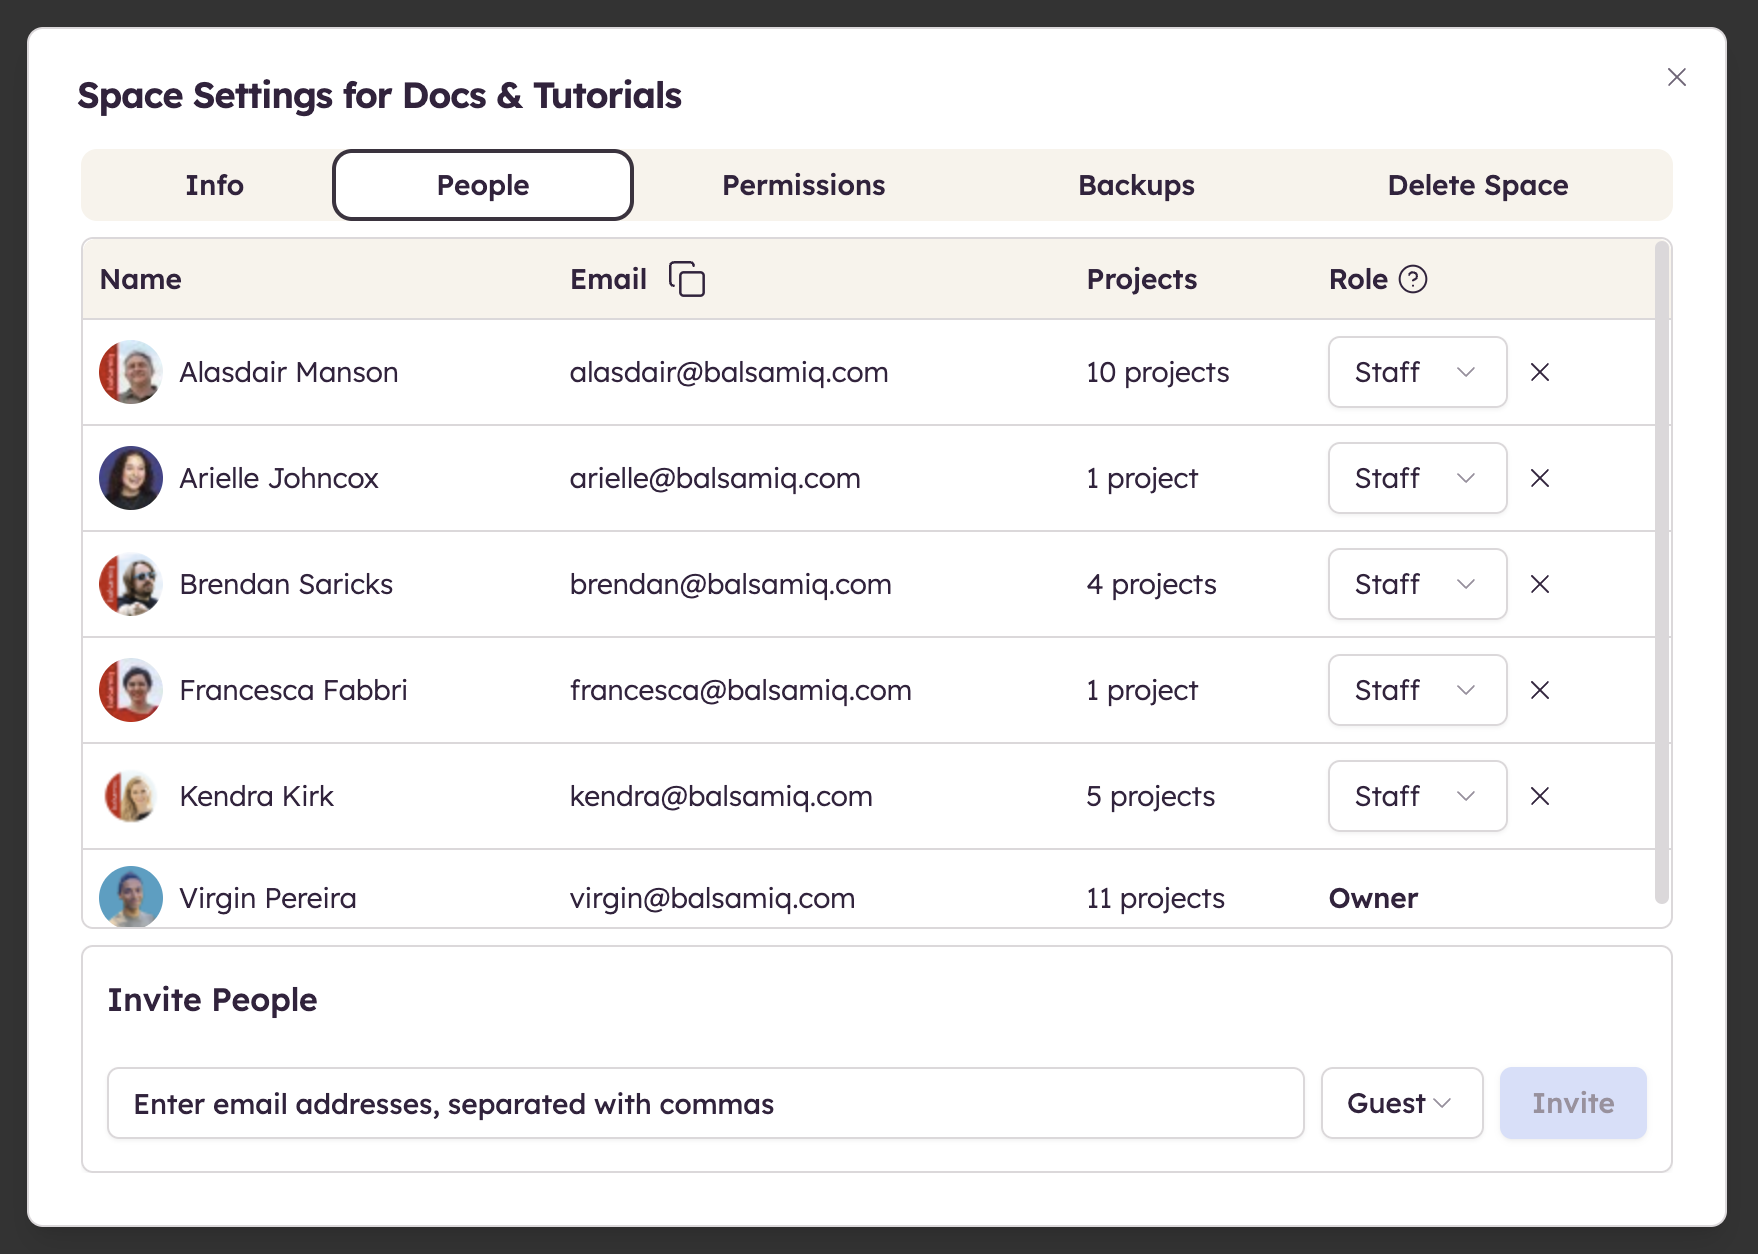
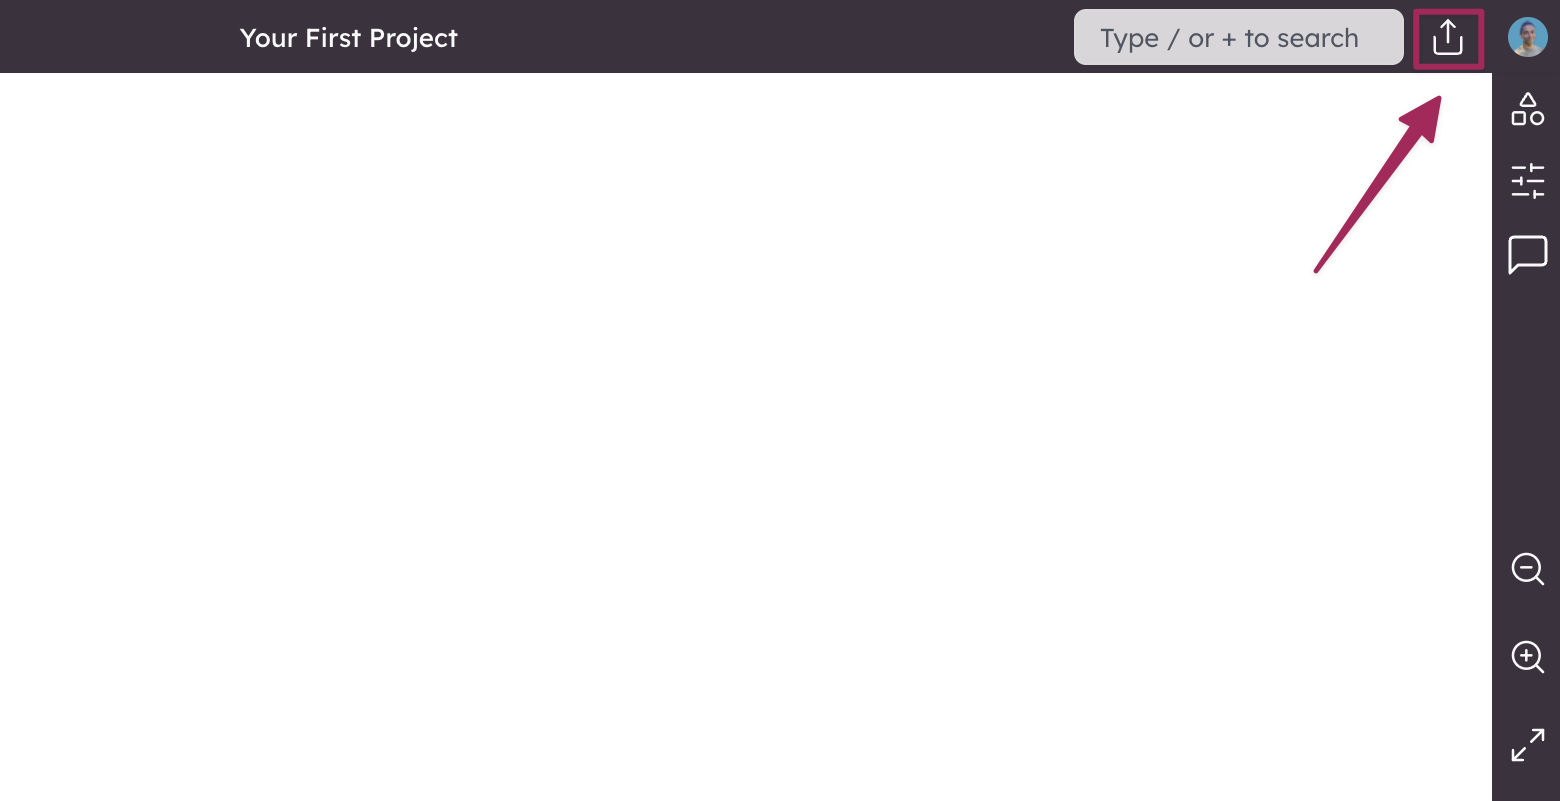
Managing users on a specific project is something a Space Owner or Staff Member (as long as they own the project) can do from the Share button in the upper-right corner.
Note: When you use Cloud for the first time, the button label is Invite your team.
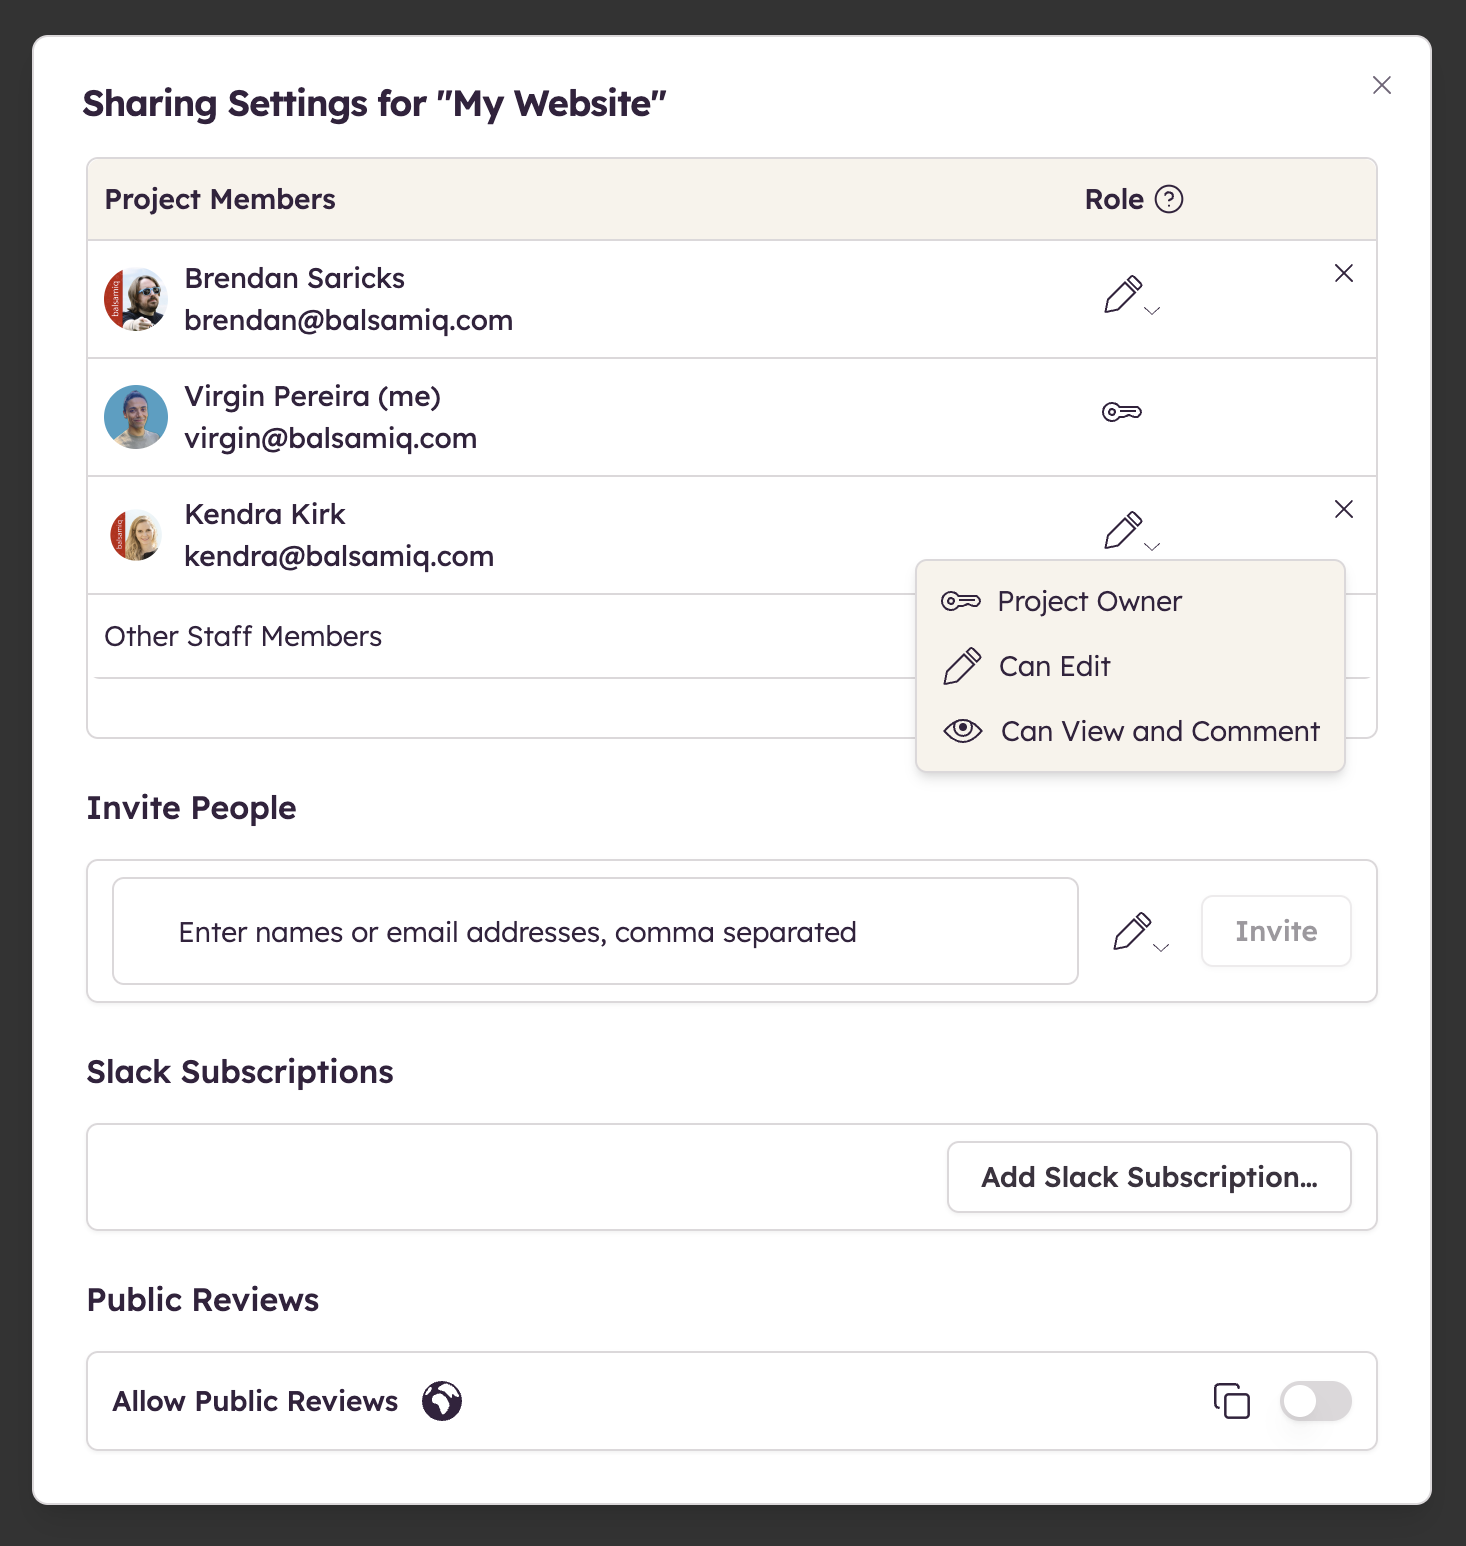
The Sharing Settings panel will appear and display a list of users and their permissions on that particular project. Project Owners and Staff Members can edit user permissions from the Role dropdown menu next to a user's information.
Inviting someone to a project
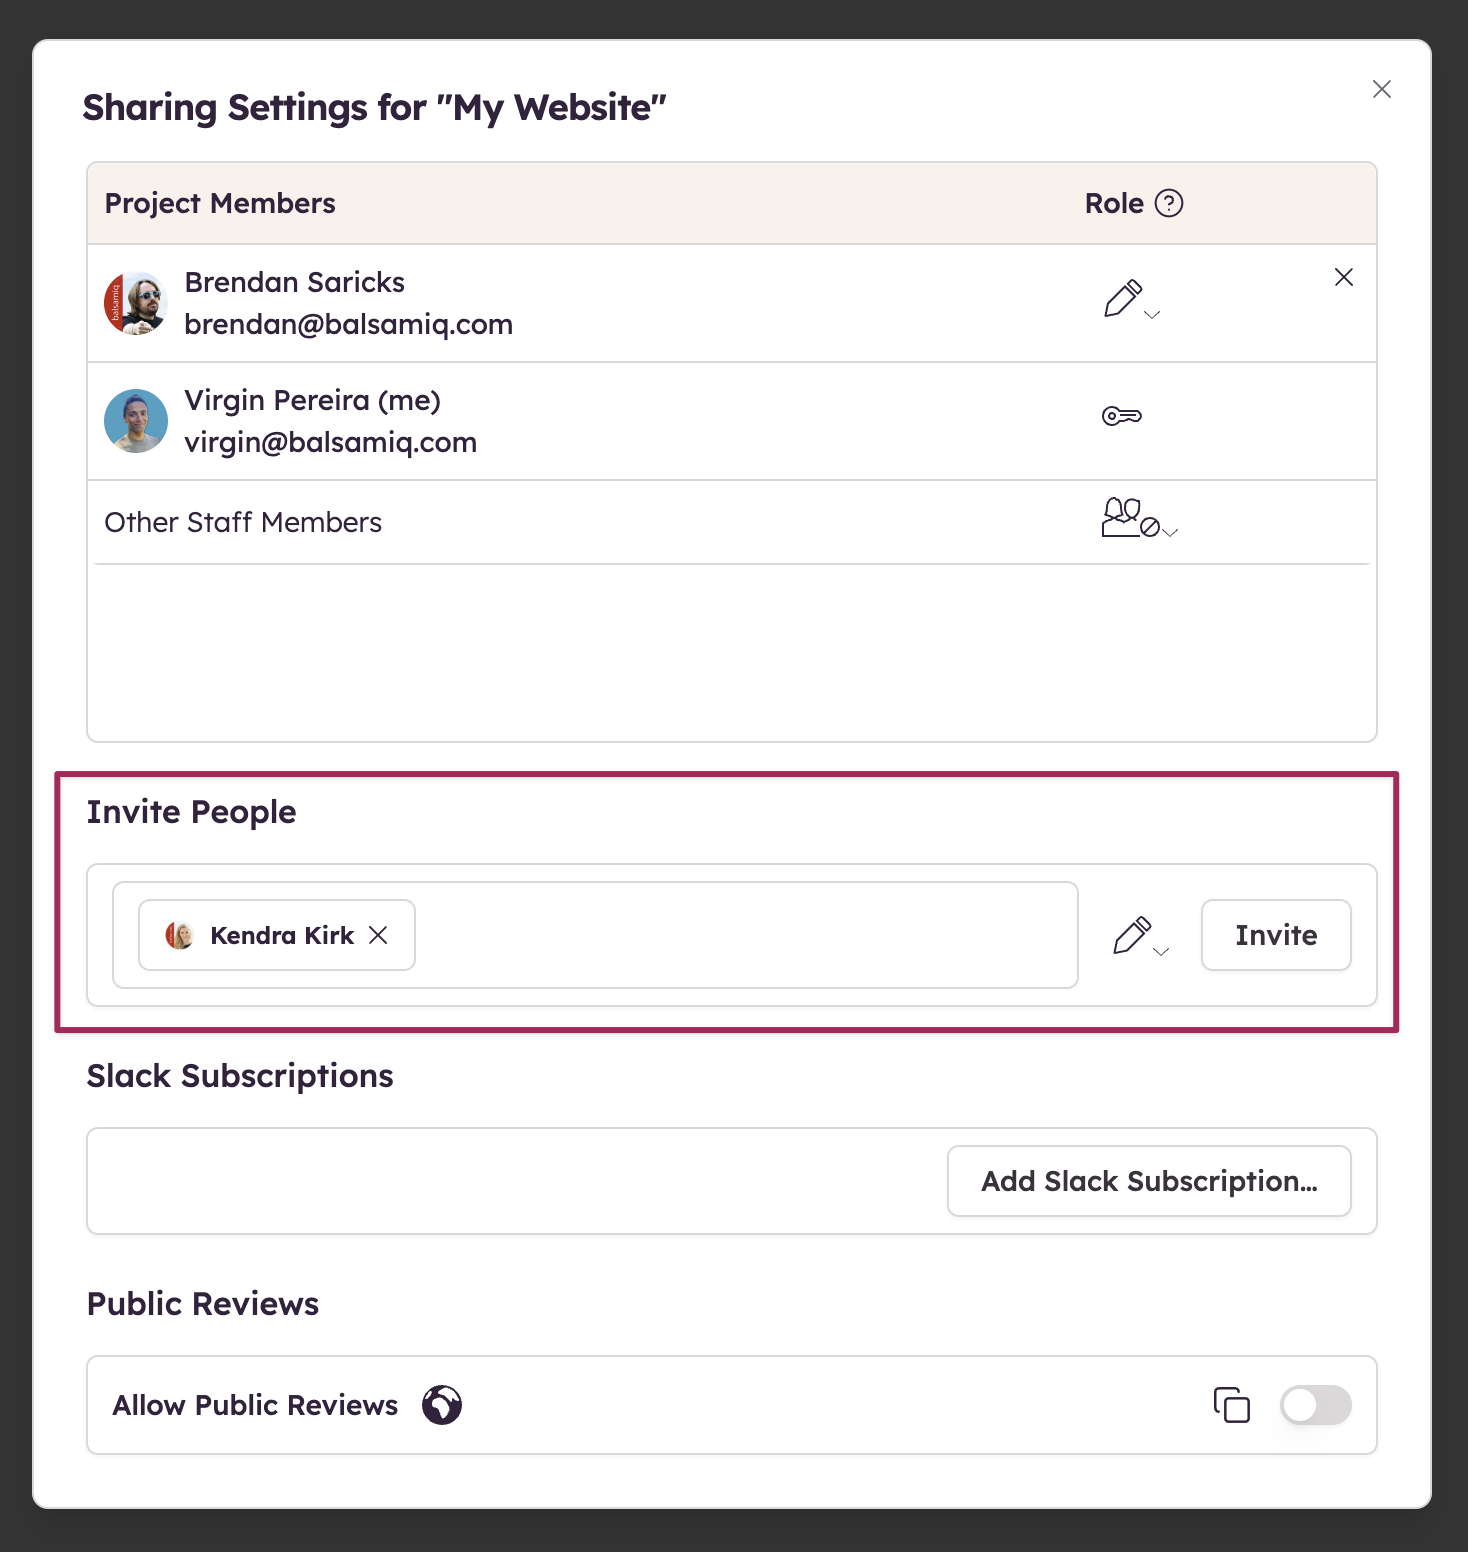
To invite a user to a project, type their name (for existing users) or their email (for new users) into the Invite People box. You can invite multiple users this way, just separate their names/emails with commas.
Note: An invitation link is valid for 7 days. After that, it will expire and the invitation will be unlisted from the pending ones.
You can select their access level when you invite by changing the value in the dropdown next to the invite button.
Removing someone from a project
To remove a user from a project, click the "X" by their permission level.
Allowing public reviews
Clicking this checkbox will allow anyone to view and comment on the project, including anonymous users that you have shared the project link with. Anonymous users cannot edit the project.
Note: This setting is only available to the Project Owner and Space Owner.