Setting up a space for Single Sign-On authentication (SAML)
On this page
Note: This feature is only available for Enterprise users.
Single-Sign-On (SSO) is a secure way to let users log in to the different services that a company uses. It is a good alternative to using multiple passwords and might even be a requirement for some companies.
Balsamiq Cloud supports SSO via Security Assertion Markup Language (SAML). When the feature is turned on, users will be able to log into Balsamiq Cloud via their company's Identity Provider (IdP).
Please note that all users will be considered Staff Reviewers by default. You can make them Staff Editors if you have editor seats available (there are no guest permissions on SAML Spaces).
Configuring Single Sign-On
Note: the following steps require an existing Identity Provider account with an email, first name and last name.
Space Owners can configure SSO from the Space Settings, as shown below.
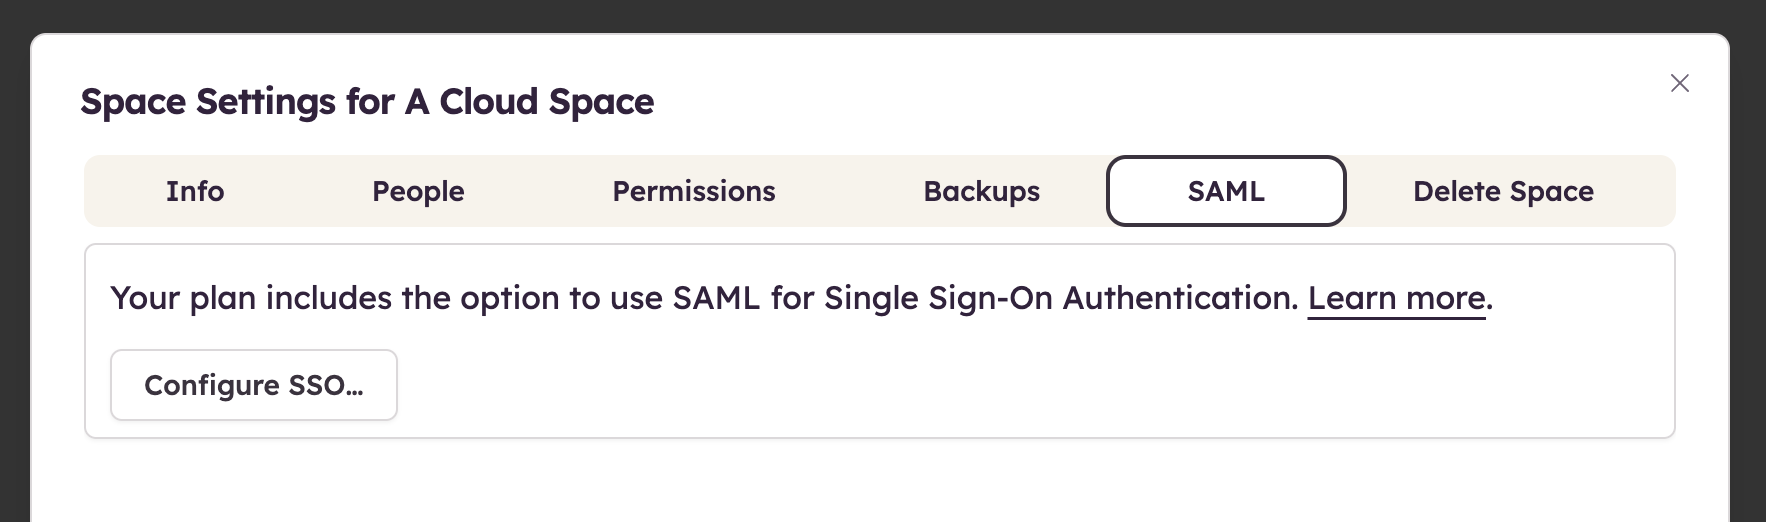
Clicking "Configure SSO..." reveals the four configuration steps below that will help you set up Balsamiq Cloud as a SAML Service Provider.
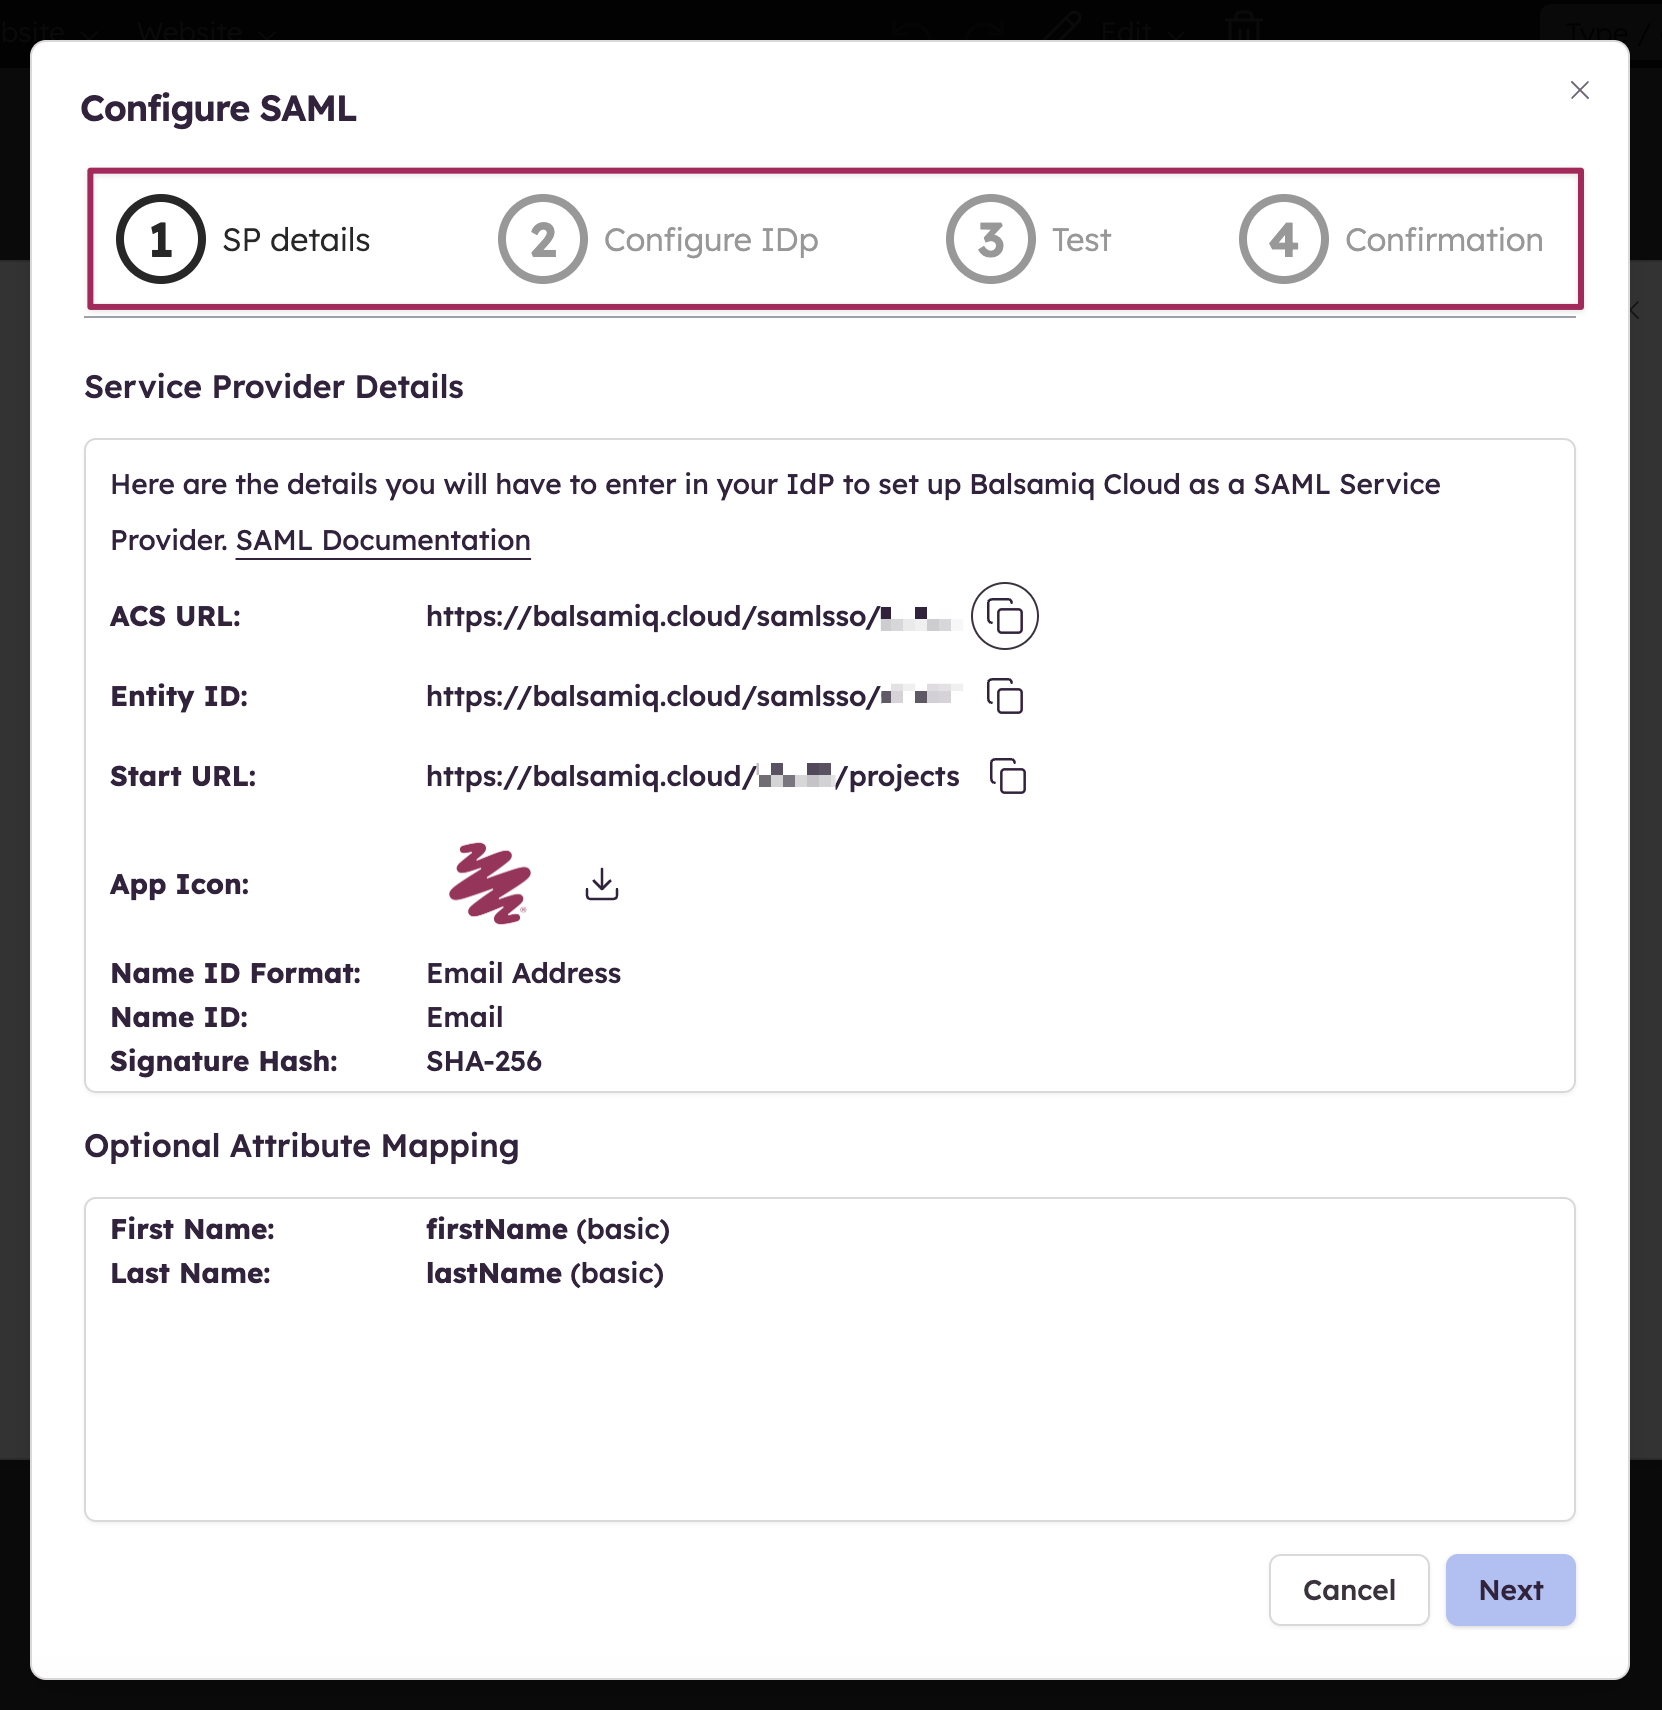
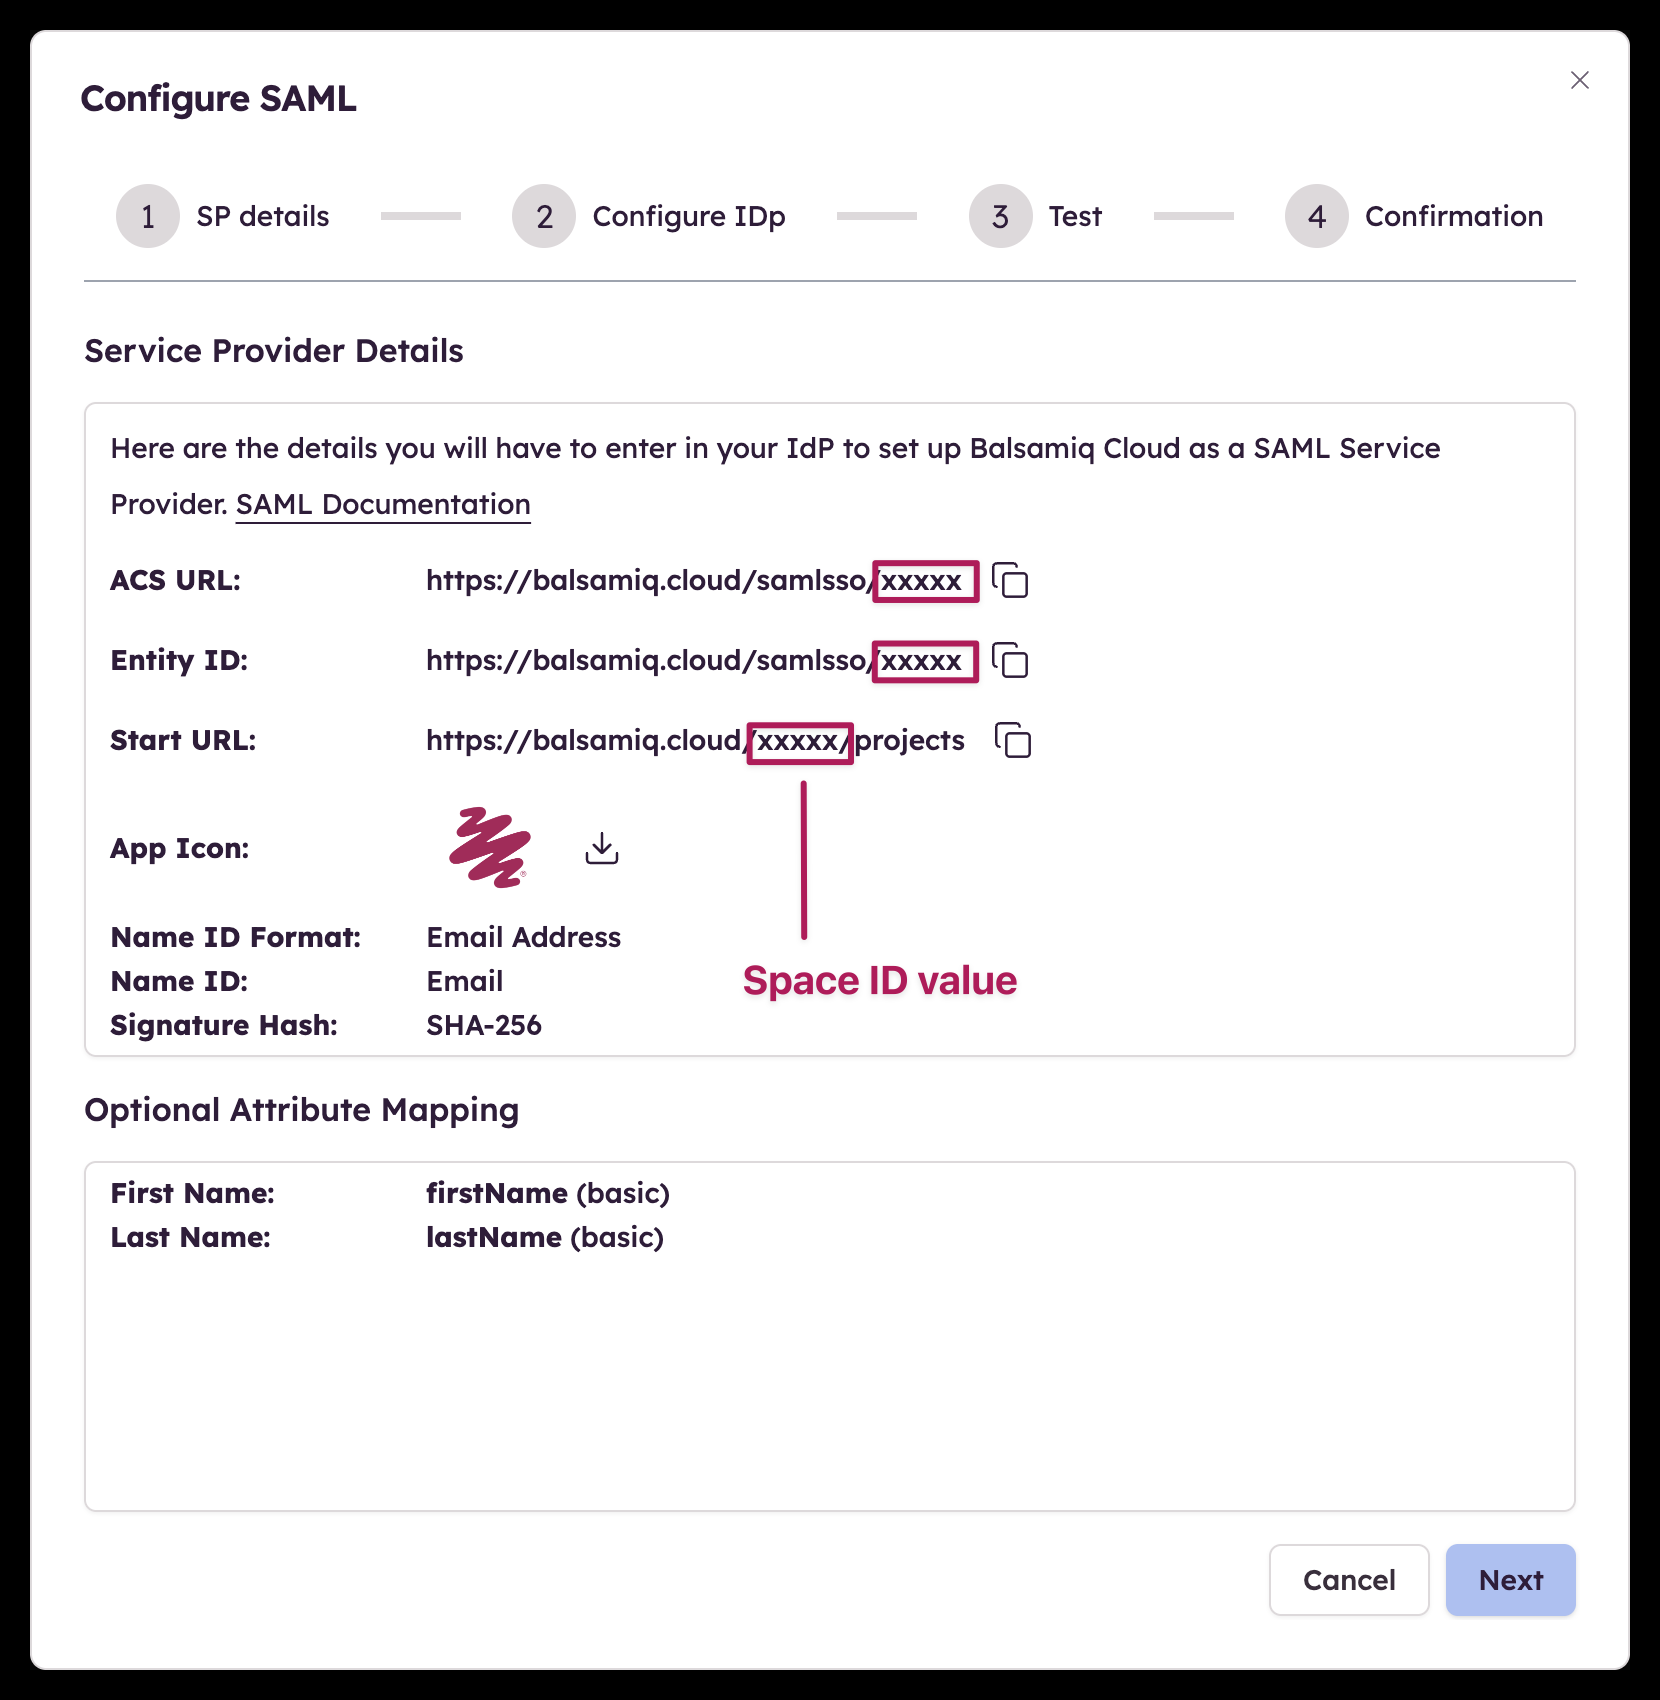
Step 1 - Service provider details
The first step of the configuration provides the details you need to enter in your Identity Provider to set up Balsamiq Cloud as a SAML Service Provider. Some terminologies might differ from one IdP to another so we'll cover some of those differences in this section.
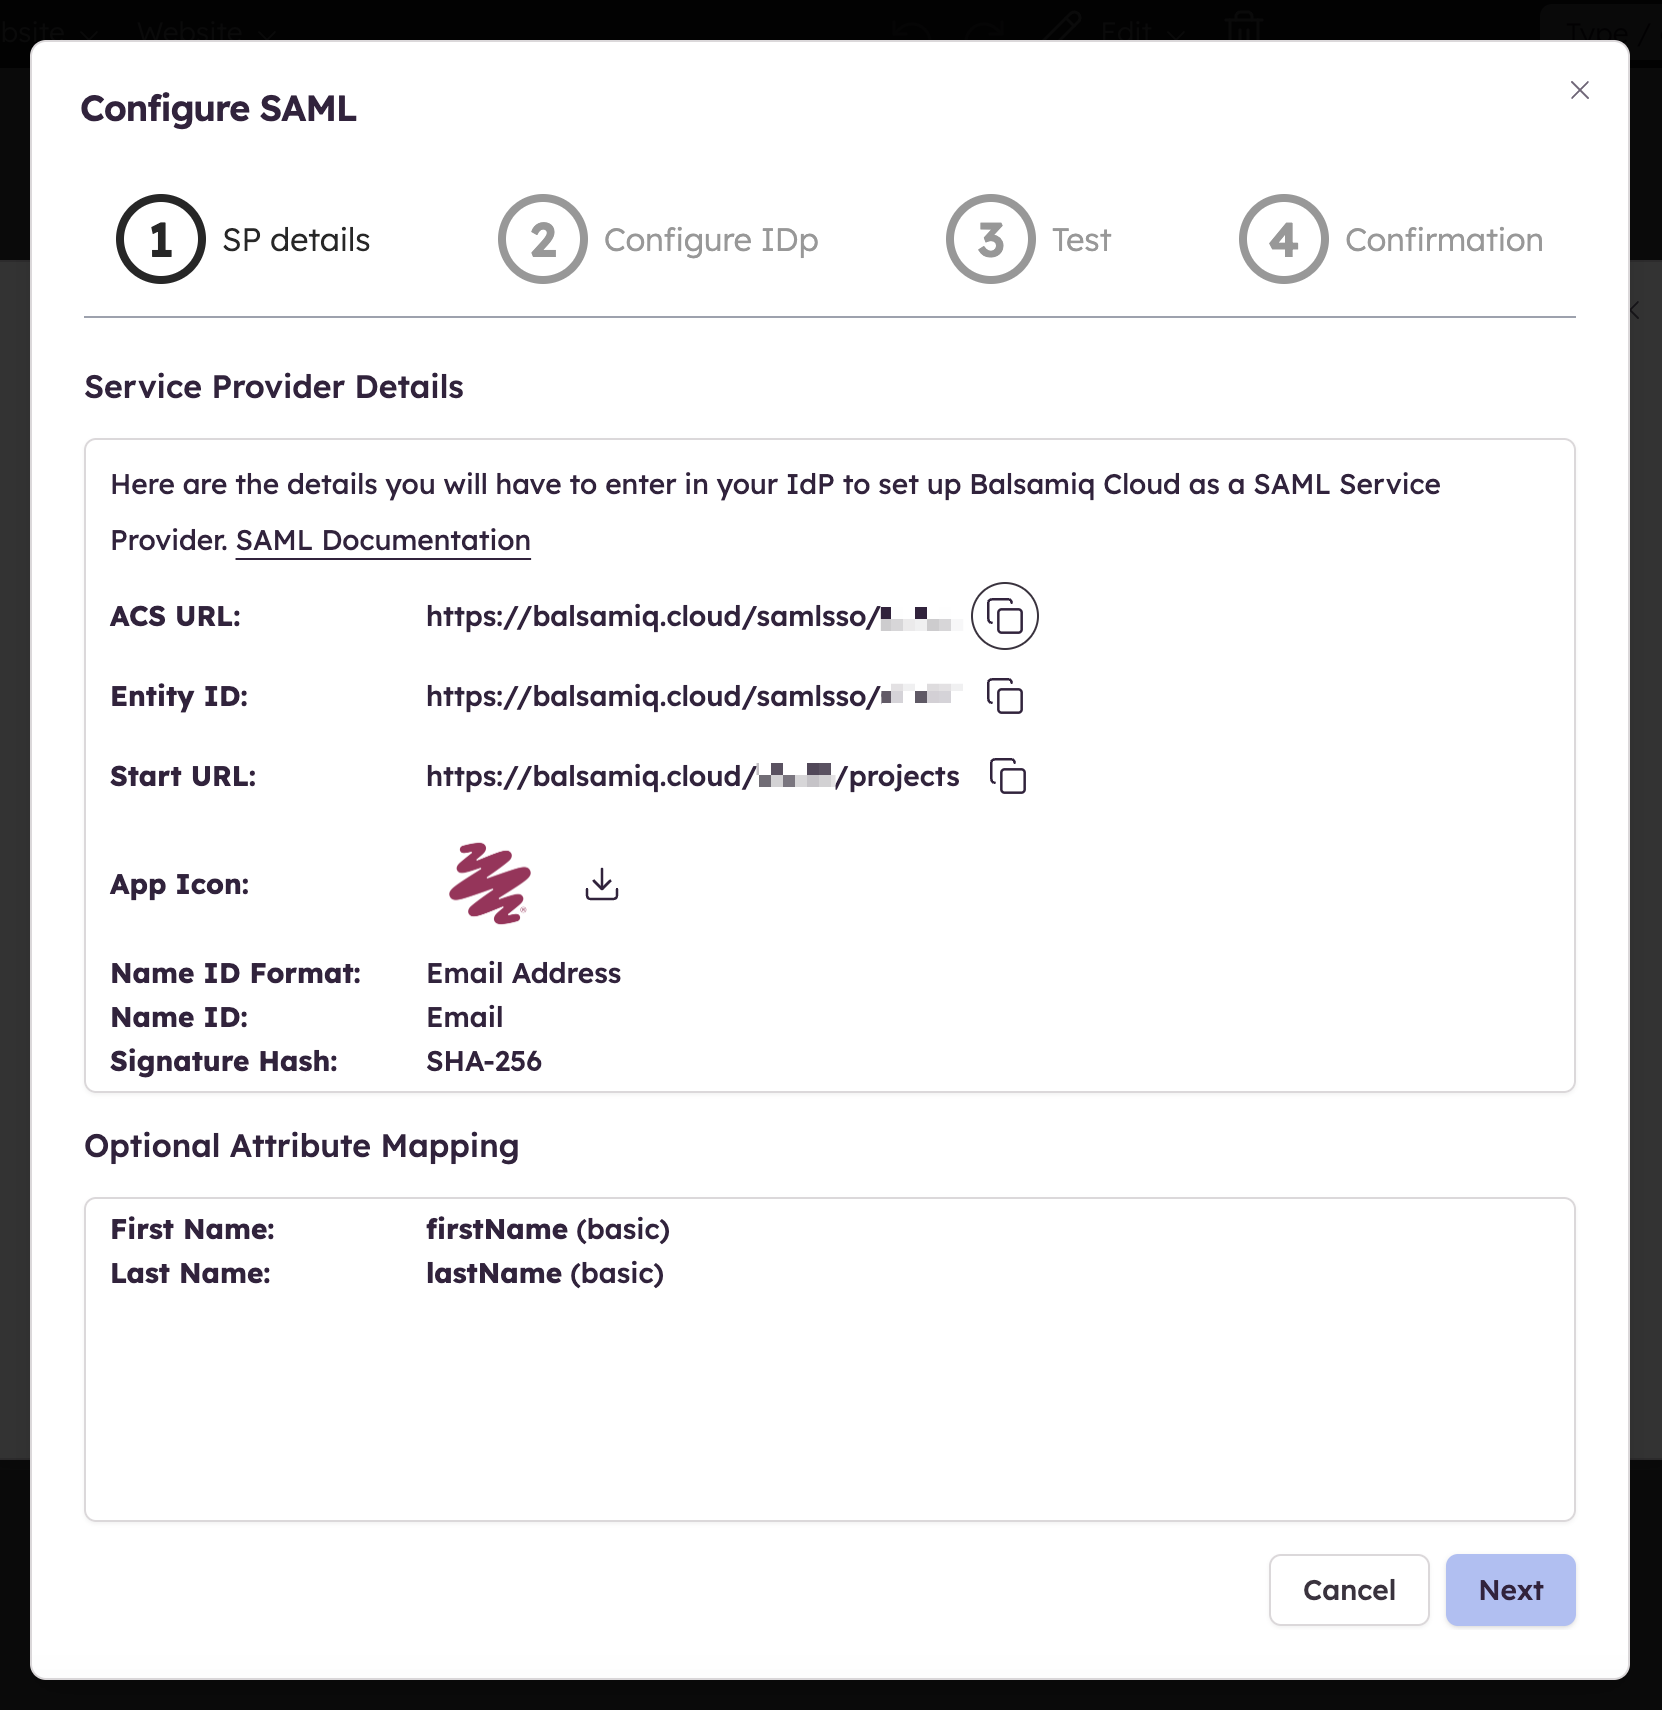
Step 2 - Identity provider details
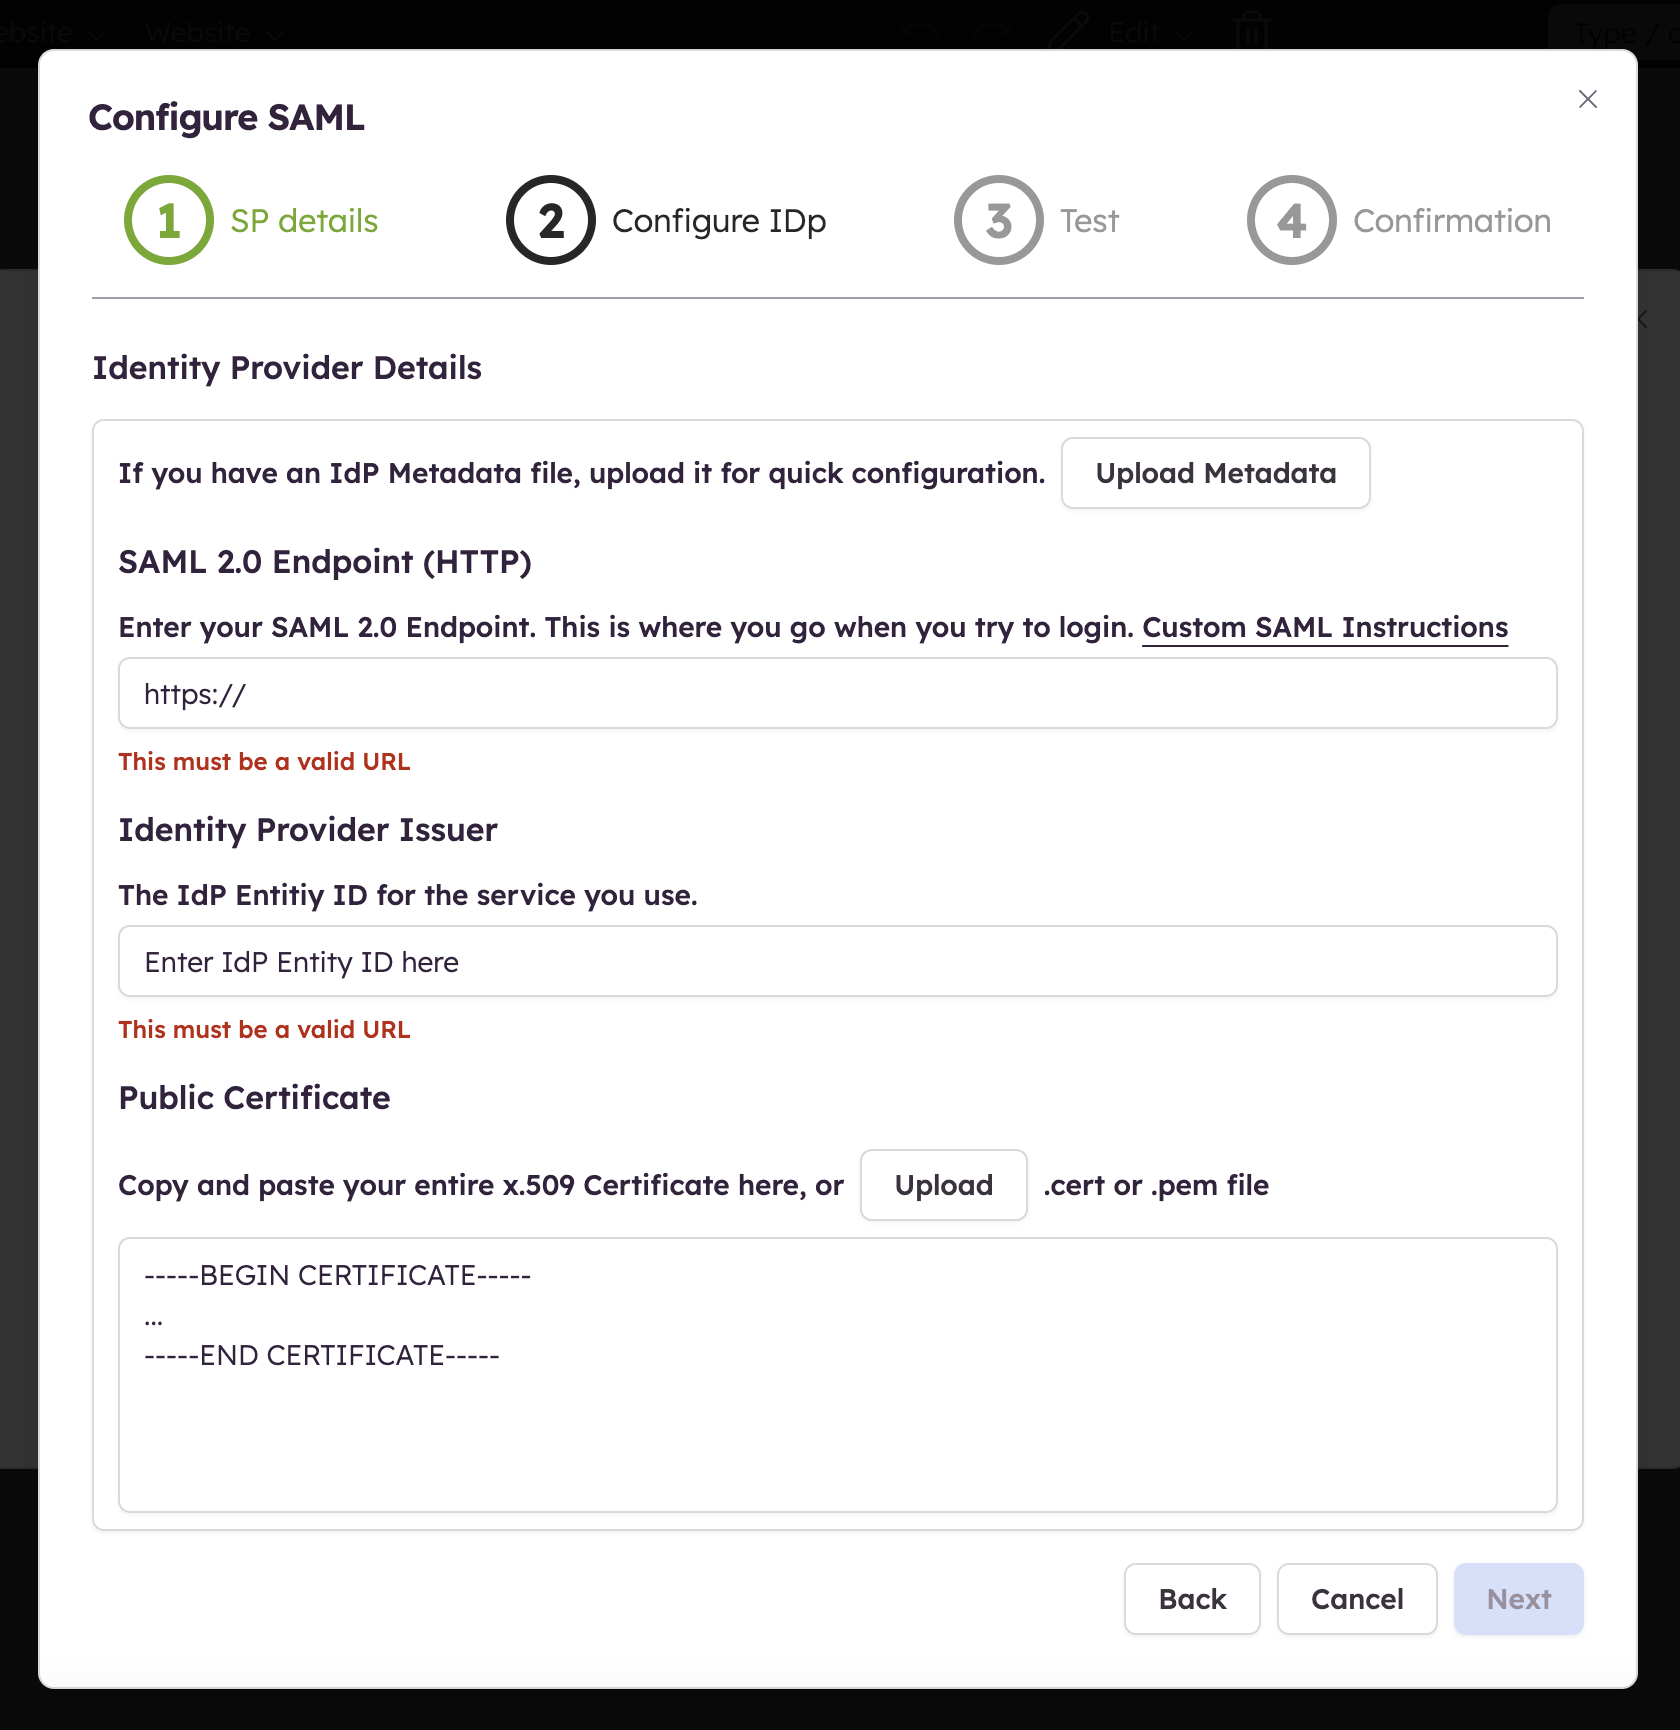
Now that you have filled in the necessary details in your IdP and validated those, let's collect the resulting details needed to set up Balsamiq Cloud:
- the SAML 2.0 Endpoint
- the IdP Issuer
- the Public Certificate
Note: If you have an IdP Metadata file and upload it, the fields will be automatically populated.
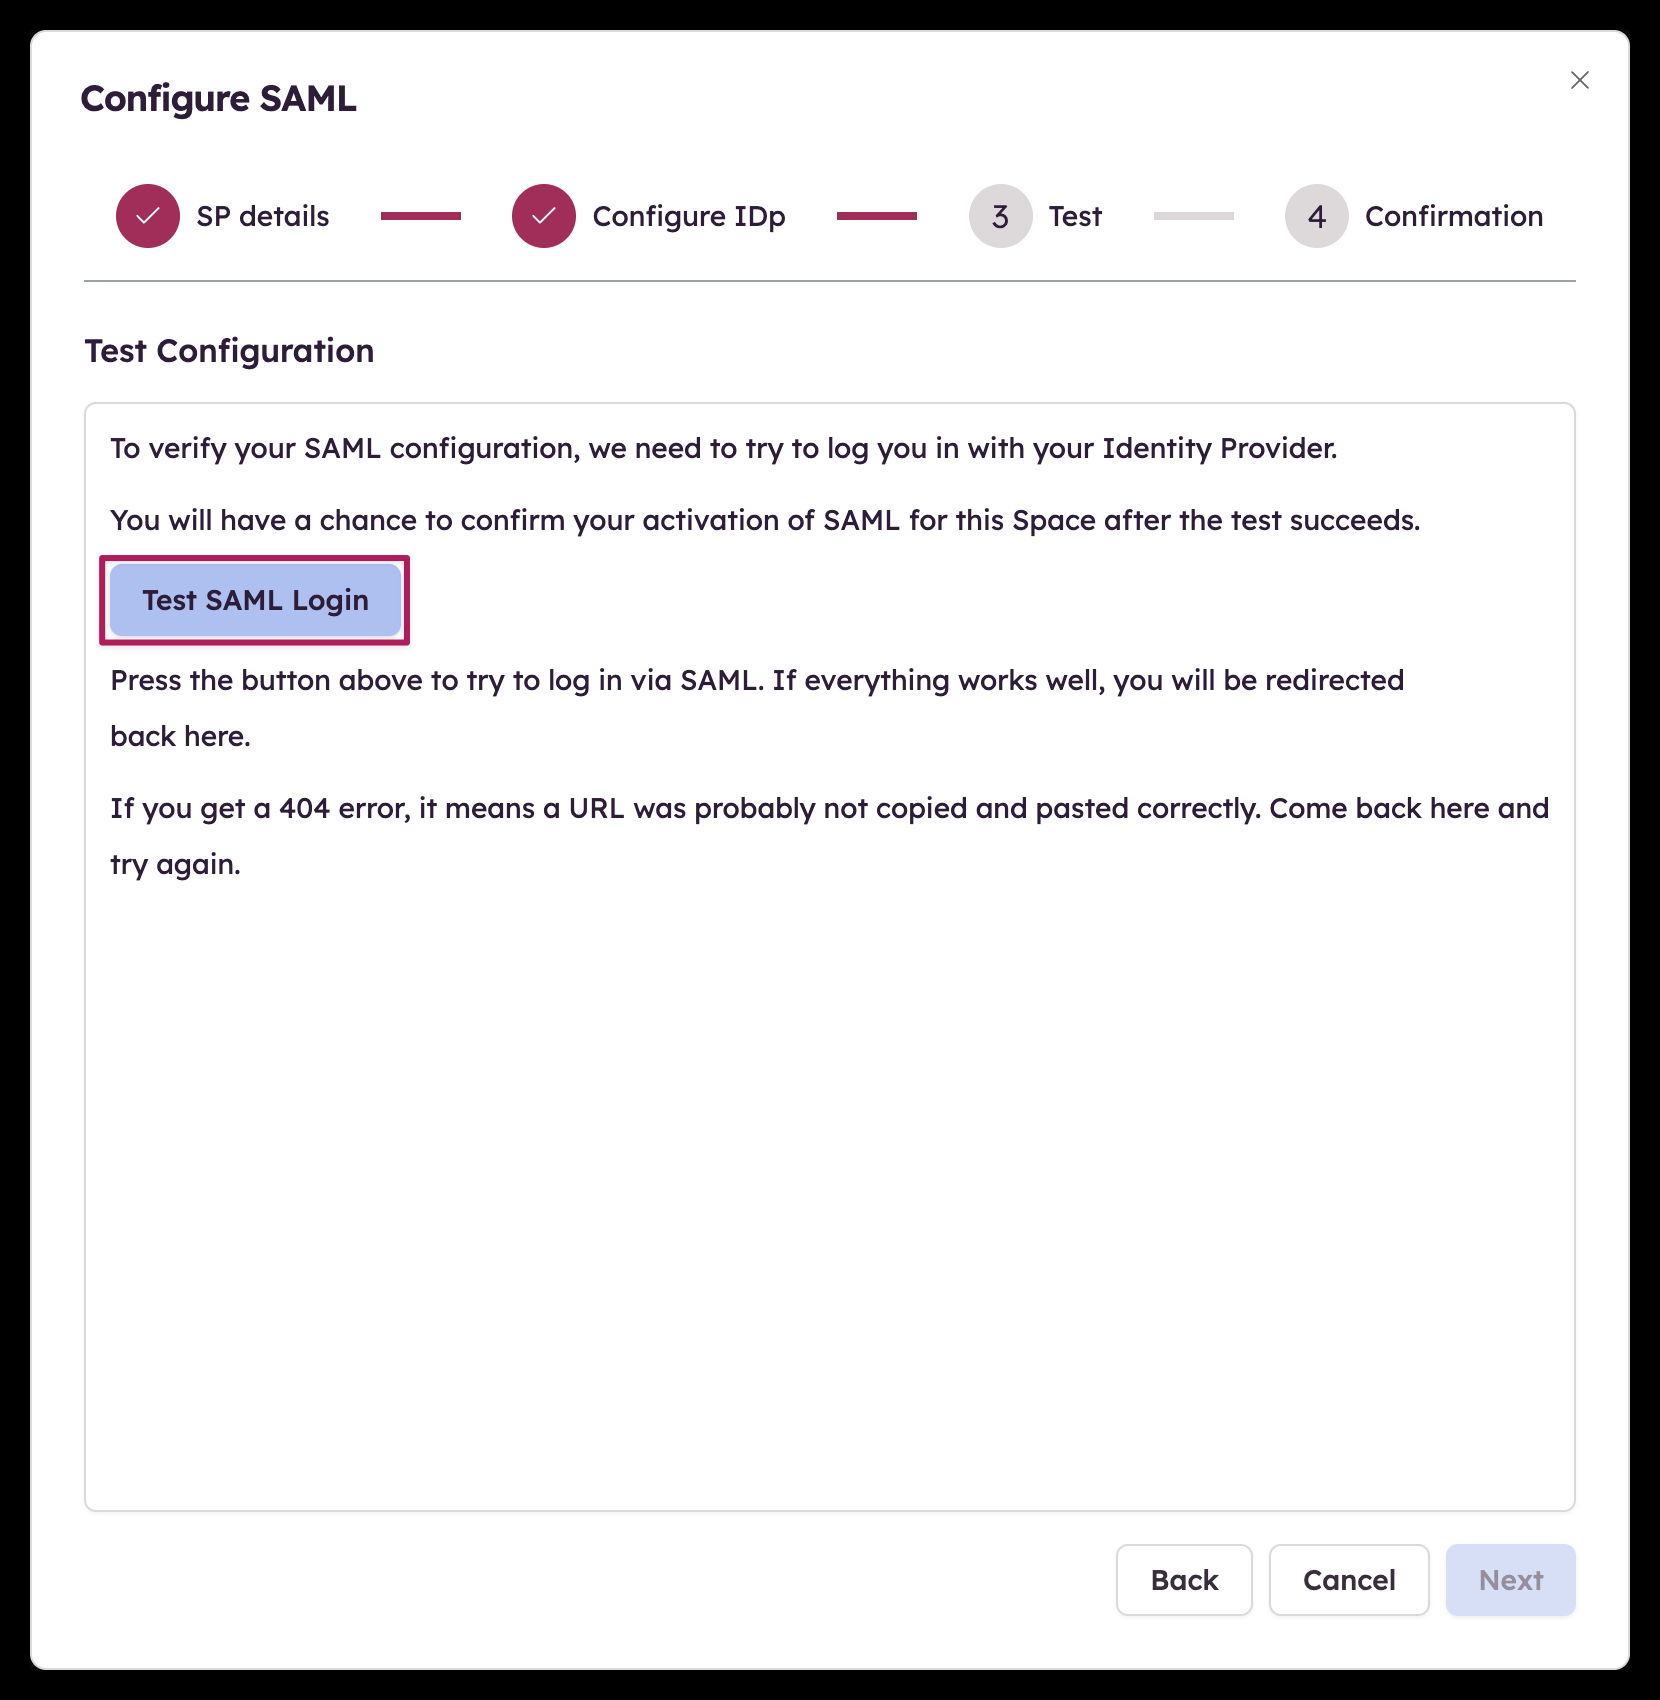
Step 3 - Test configuration
All details should have been set up in the first two steps, it's time to verify your SAML configuration before we can turn it on.
Step 4 - Turn on SAML
Now that the verification has been made, the last step allows you to turn on SAML for your Space!
Advanced configuration
As mentioned above, each IdP has a slightly different process (or wizard) with some specific terminologies.
Here is an overview of some of the most used IdPs and their specific differences to help you configure your own setup.
Okta
The Balsamiq Cloud SAML integration for Okta currently supports the following features:
- IdP-initiated SSO
- JIT (Just In Time) Provisioning
- SP (Service Provider)
For more information on the listed features, visit the Okta Glossary.
Before configuring your SSO settings in Balsamiq Cloud, use the Okta Administrator Dashboard to add an application and view the values that are specific for your organization. This setup will likely fail without parameter values that are customized for your organization.
Sign into your Balsamiq Cloud Owner account.
Click the SAML tab in the Space Settings as shown in the Configuring Single Sign-On section above.
Click the "Configure SSO..." button.
Make a copy of your Space ID value:
In Okta, select the Sign-On tab for the Balsamiq SAML application, then click Edit.
Enter your Space ID value into the corresponding field and click Save.
Download the IdP metatdata as an XML file.
Upload the metadata file you just downloaded as described in the Step 2 - Identity provider details section above.
Click Next.
Test your configuration and, when the test completes successfully, turn on SSO.
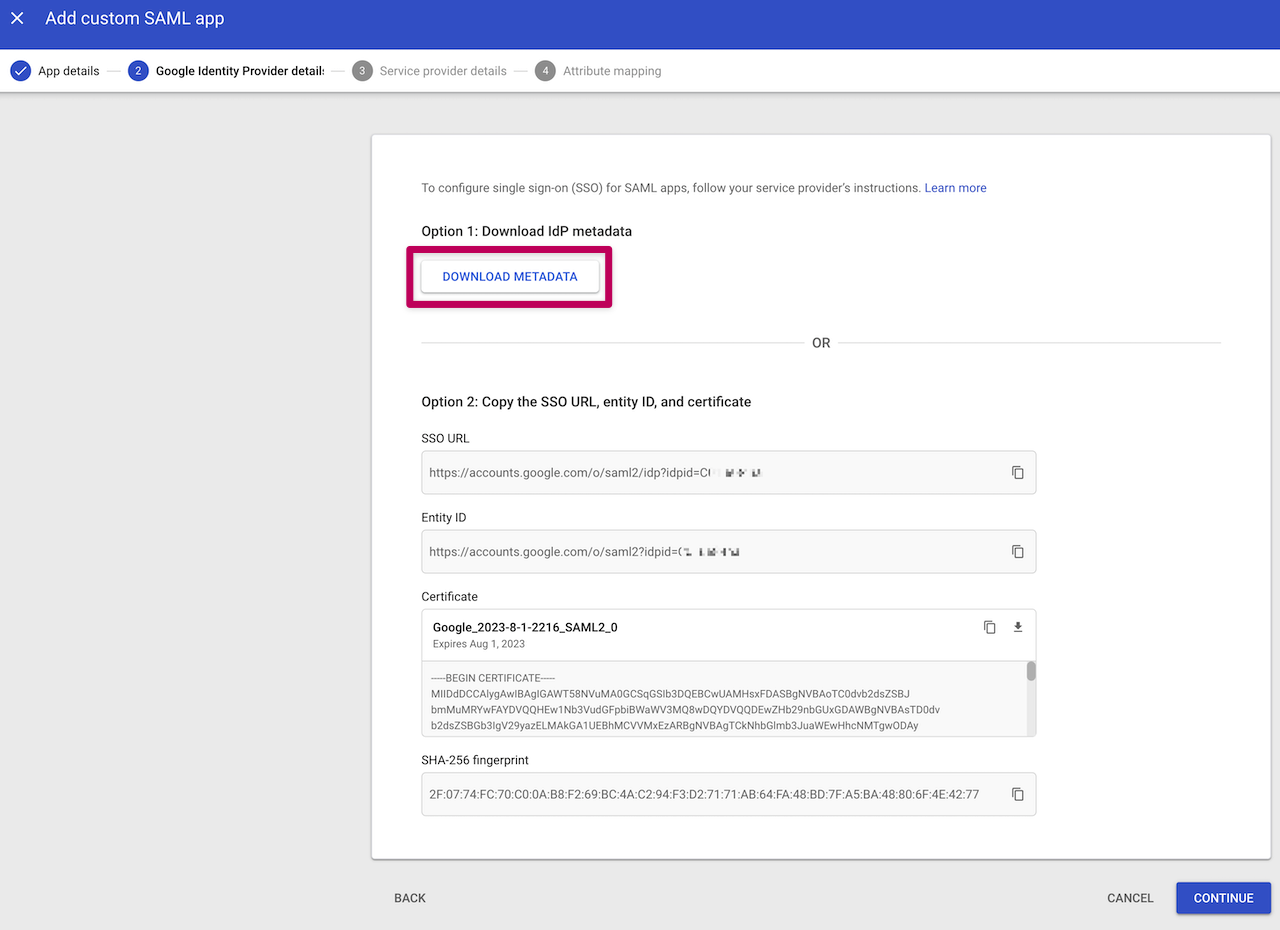
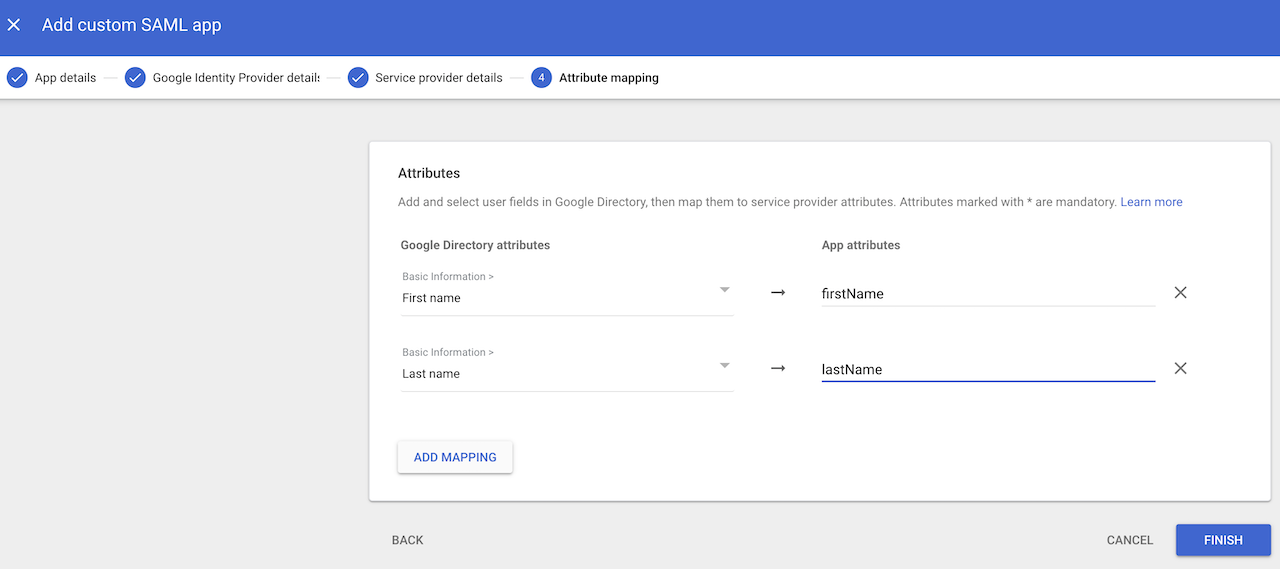
Google also uses (almost) identical field names than our configurator. The only setup difference is that the Metadata file needed for our Step 2 can be downloaded before adding the details from our Step 1.
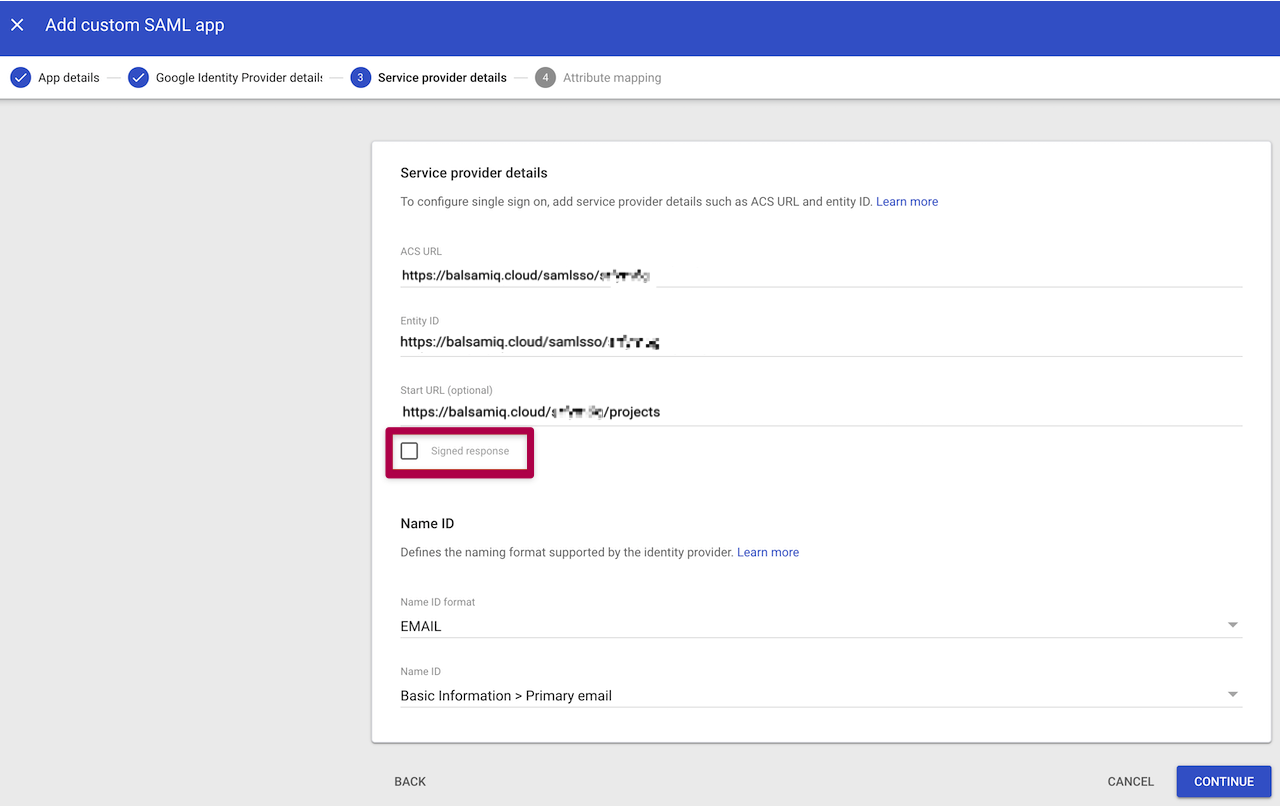
Note: Make sure to leave the “Signed Response” checkbox unchecked in this step.
Windows Server ADFS
Windows Server Active Directory Federation Service (ADFS) is another popular IdP that has a few particularities during the setup process.
After starting to fill out the different fields for our Step 1, you need to manually add a mapping rule with the following settings.
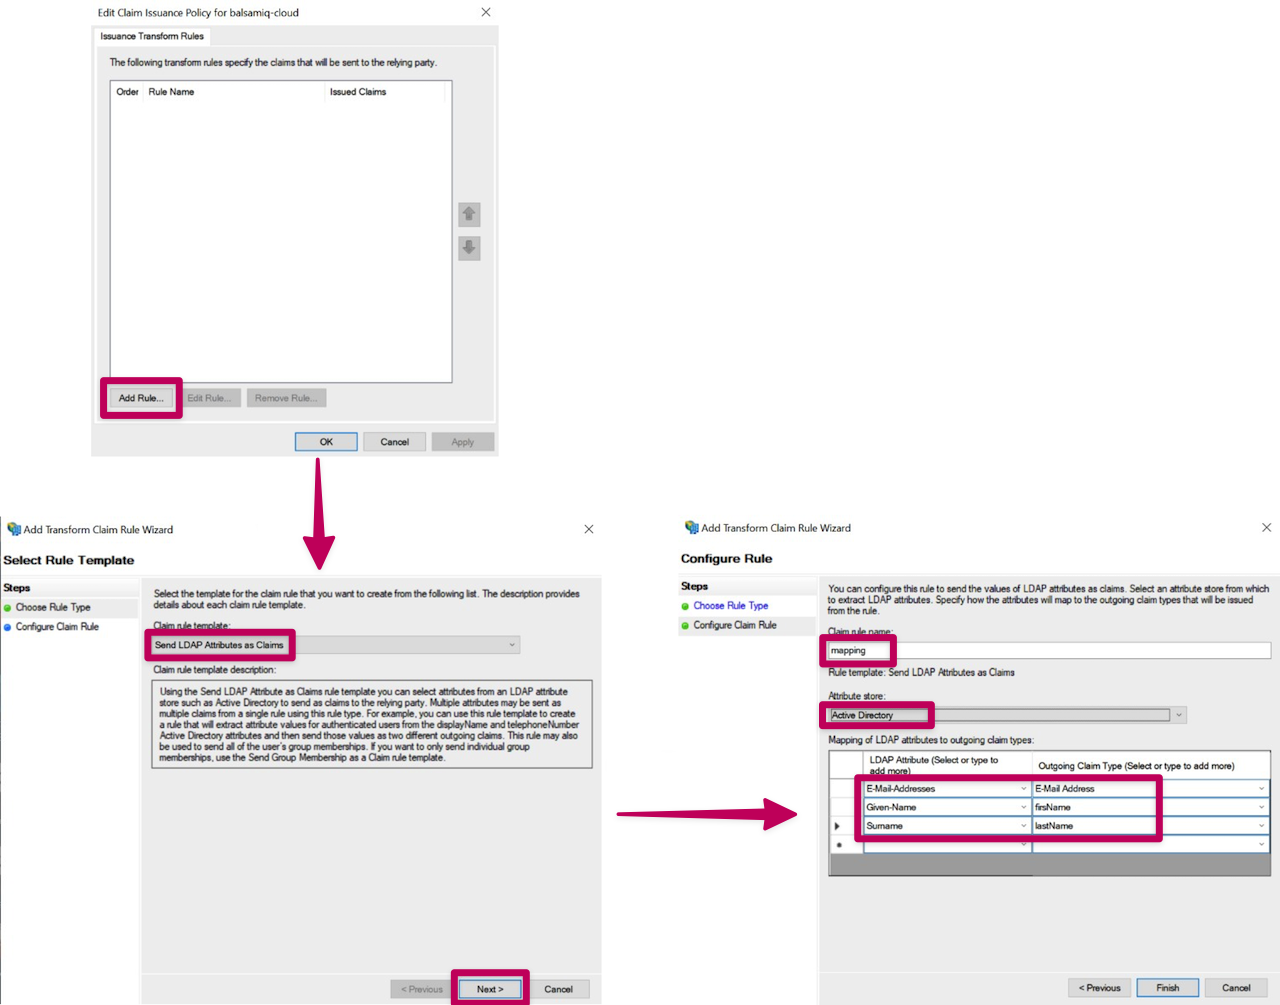
Once the mapping rule has been created, let's add a transform rule.
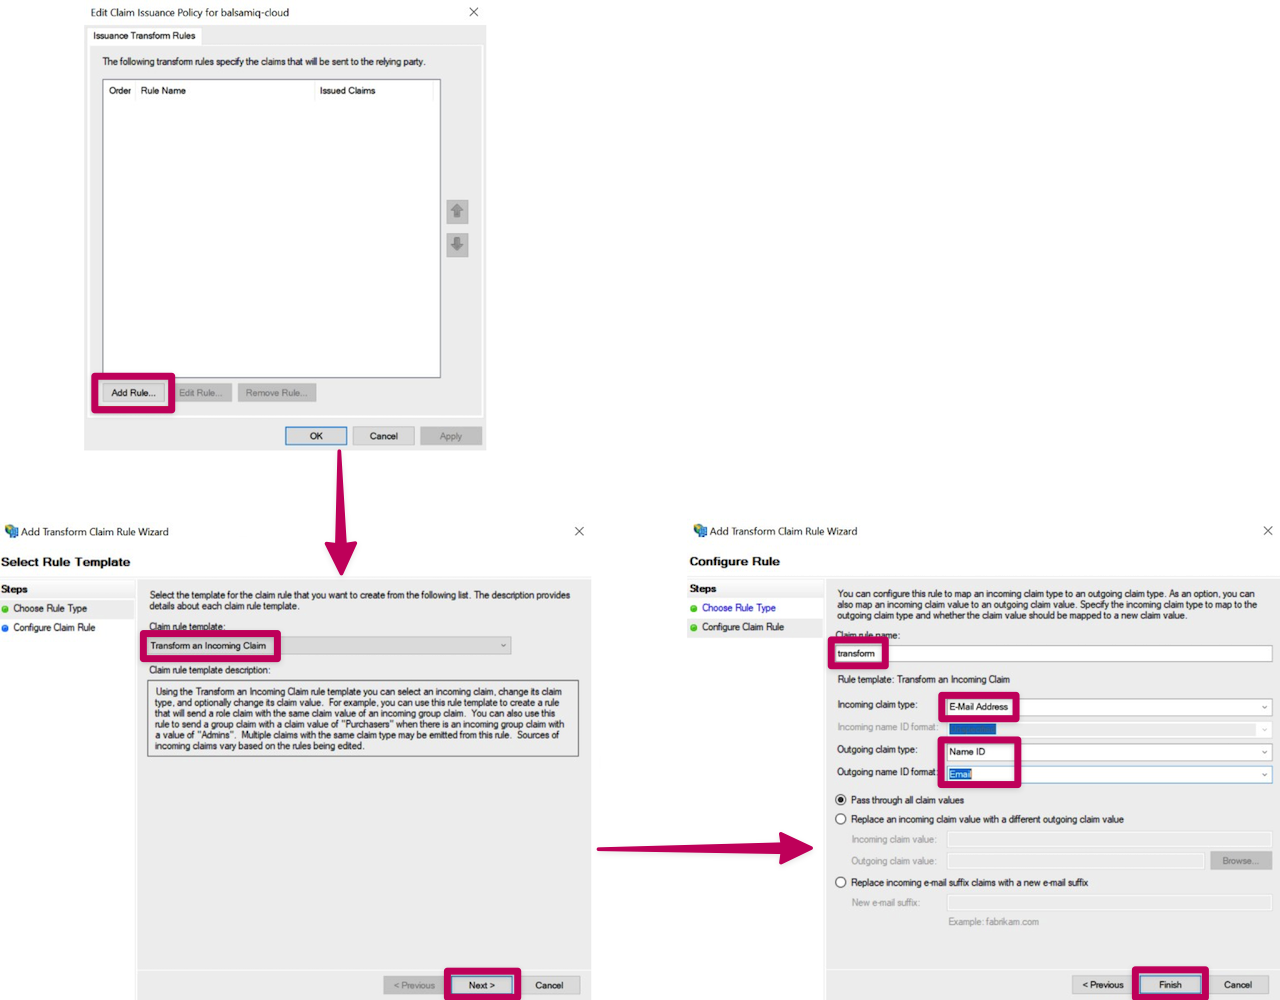
Now that the rules have been added, the Metadata file needed for our Step 2 can be downloaded from this path: https://<Federation Service name (FQDN)>/FederationMetadata/2007-06/FederationMetadata.xml
Entra ID (formerly Azure Active Directory)
Microsoft has a step-by-step guide to configuring Balsamiq Cloud for use with Entra SSO: Microsoft Entra SSO integration with Balsamiq
Keycloak
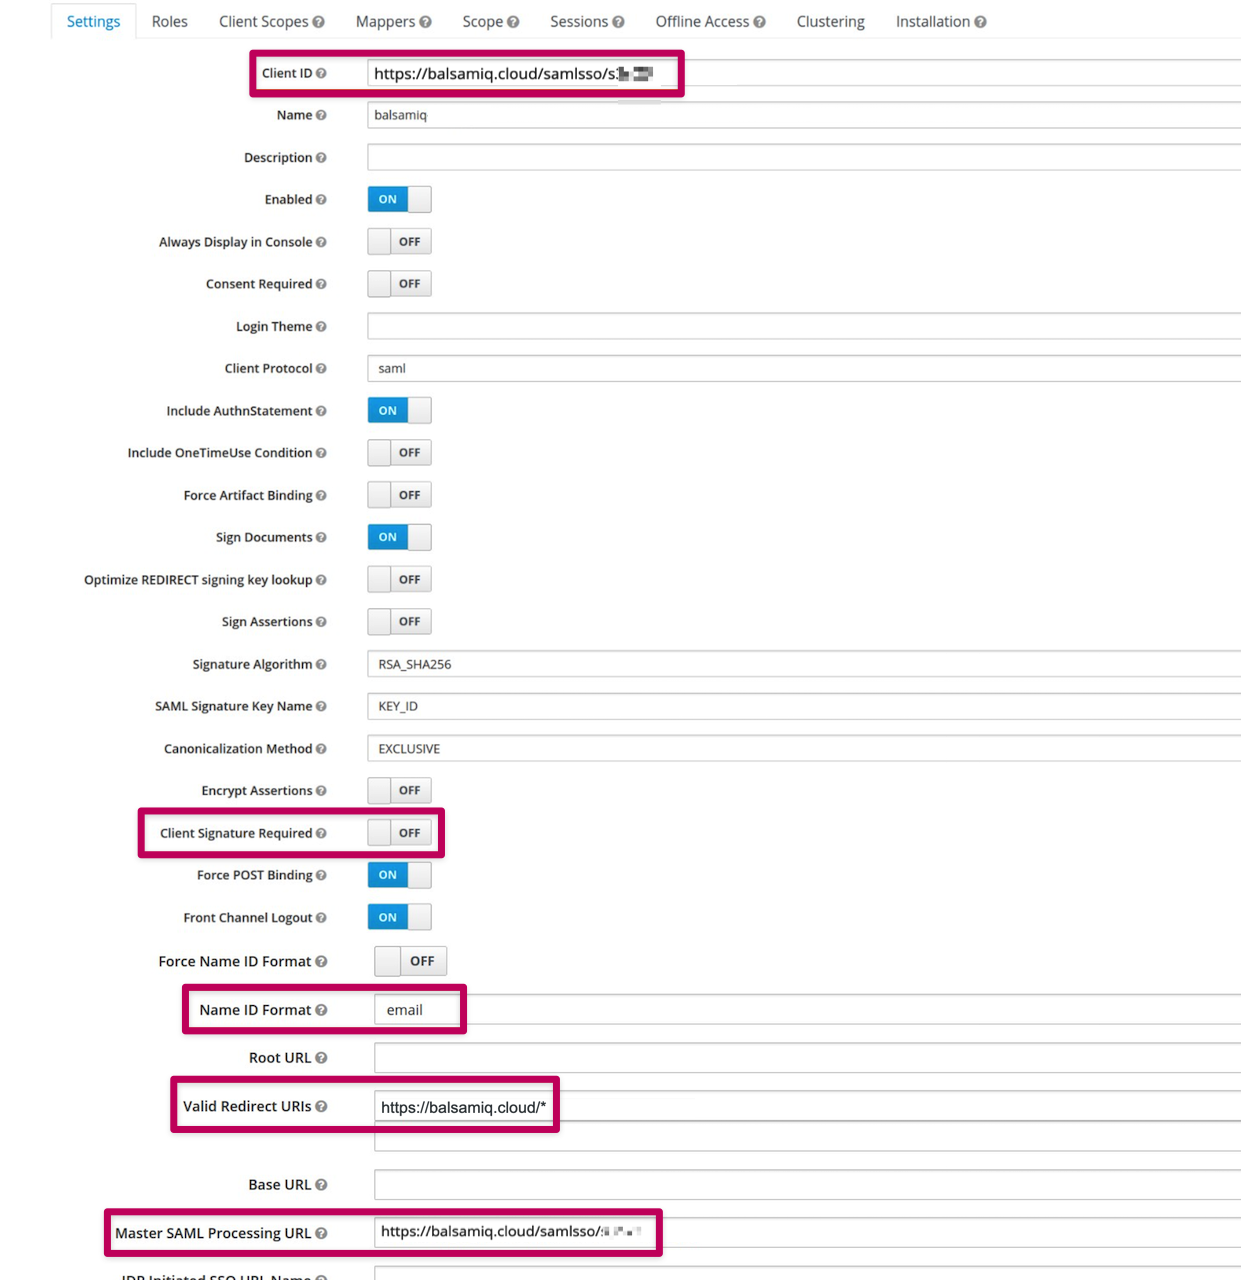
The configuration process of Keycloak is relatively in line with ours but the required fields are not necessarily ordered the same way.
Here is a quick look at the fields and options that need to be taken care of.
Turning off Single Sign-On
Space Owners can turn off SSO from the Space Settings, by clicking "Configure or Turn Off SSO..." > "Turn Off SSO..".
We hope that these examples will help you configure SSO with Balsamiq Cloud. However, don't hesitate to reach out to us via support@balsamiq.com if needed. We're here to help! :)