Everyone wants to move fast. That’s the easy part.
The hard part is moving fast in the right direction.
Most teams lose time not in the building, but in the deciding. They jump straight into code or high‑fidelity design, only to discover—usually too late—that the idea wasn’t fully baked.
A prototype fixes that.
It’s the tool that helps you figure out what to build before you build it.
This guide walks through how to prototype a product the right way, why it matters, and how to use Balsamiq to do the thinking work that keeps teams aligned and moving quickly.
What is a product prototype?
A product prototype is a working model of your idea—something you can show, click through, and test before a single line of code is written. It’s the fastest way to see if your assumptions hold up in the real world before you commit to the high cost of development.
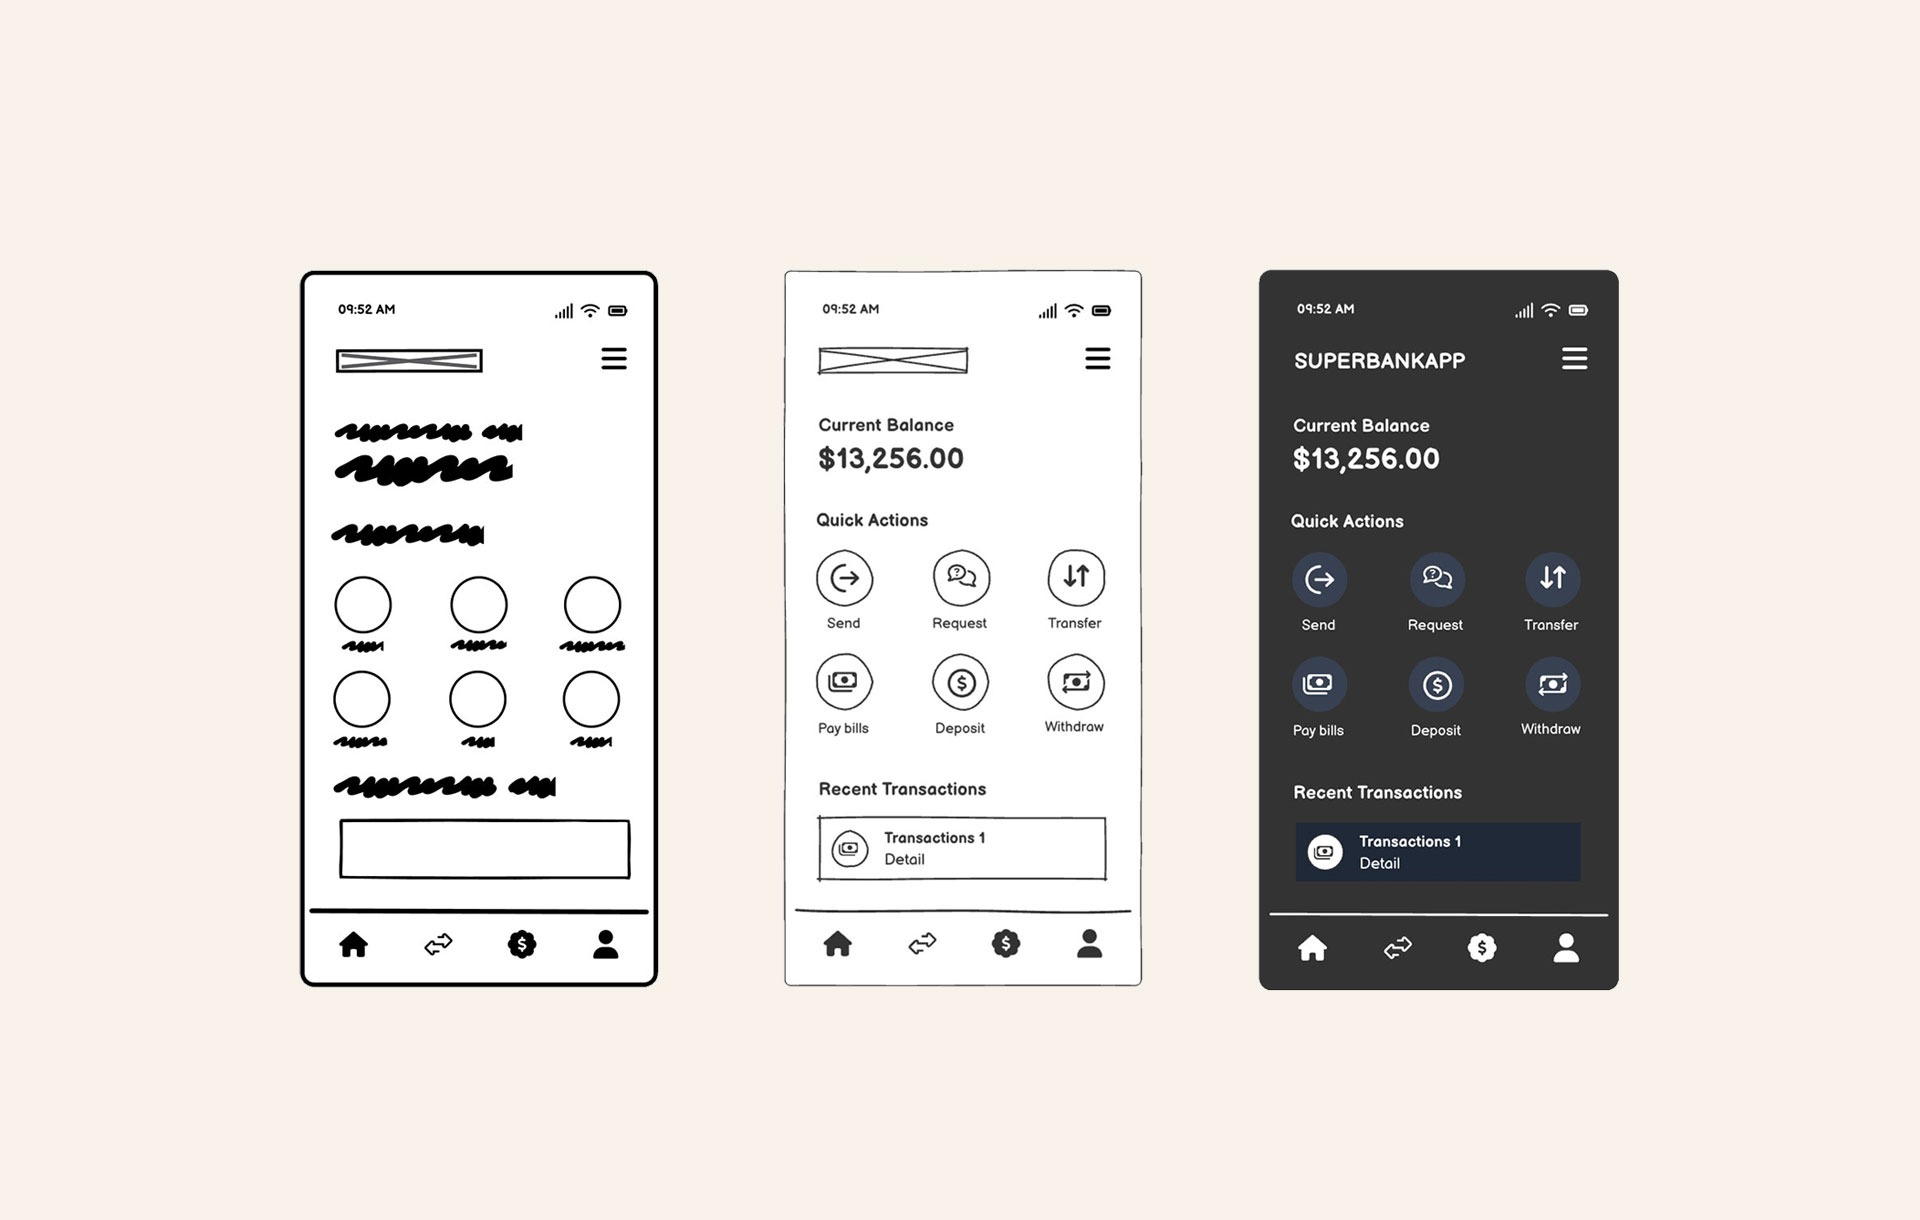
Think of it as a spectrum of detail. Most successful products move through two distinct phases:
Phase 1: Low-fidelity prototypes (wireframes)
Low-fidelity prototypes focus on structure, flow, and logic. By stripping away visual polish like colors and branding, you remove distractions. Wireframes are perfect for early alignment and answering the big question, “Does the core logic of this idea actually make sense?”
Phase 2: High-fidelity prototypes (interactive, clickable, tappable)
High-fidelity prototypes look and feel much closer to the finished product. They’re designed for user testing and stakeholder walkthroughs where you need to simulate the final experience to get sign-off.
"Speed is great when you’re building, but it can really backfire when you’re deciding what to build. That part can’t be rushed or automated: it’s where a product manager’s judgment and vision actually matter. Quick brainstorms and half-baked PoCs rarely tell you if an idea is truly worth pursuing."
 Matteo Frana,CEO & CTO @ React Bricks

Prototypes are essential for making confident judgment calls. Use them as a way to fail cheaply and iterate quickly, so that when you finally commit to code, you do so with a clear understanding of what you’re building and why.
Prototyping tools for every stage
Choosing the right tool depends on what you’re trying to solve. Some tools help you think through logic, while others help you generate code or visuals. And many of the newer AI‑powered tools are incredibly eager to help—sometimes too eager.
"These tools love to be helpful, but sometimes they’re a little too helpful. You ask for a login form and suddenly you’re looking at a full authentication system. Great for production, terrible for learning."
Peldi Guilizzoni,Founder and Product Designer @ Balsamiq

Here’s a few options that serve different parts of the prototyping lifecycle:
- Balsamiq — Wireframing and interactive prototyping for product builders. AI generates, you refine until you finish with a clickable prototype.
- Replit — A good choice for quick code experiments and lightweight proofs of concept (PoCs) when you need to see if a specific technical integration actually works.
- Lovable — Useful for AI-assisted app generation, allowing for rapid iteration by describing what you want to build and seeing a functional version appear.
- Bolt AI — Helpful for AI-driven coding workflows, specifically for scaffolding the initial structure of an application or feature.
- v0 — Best for fast UI generation and early visual exploration, particularly when you want to see how different layout components might look in a modern interface.
The prototype itself—not the tool—is what matters. Selecting the right software for the current moment in your process allows you to build the right thing as efficiently as possible.
Balsamiq’s 5 steps to prototyping a product
Effective prototyping follows a simple rhythm: think first, then click. Starting with the structure keeps teams from polishing too early, and separating the logic from the interaction helps you confirm the idea actually works. From there, you move through the five steps that turn a rough concept into something you can test, share, and build with confidence.
Step 1: Start with a wireframes
This is where the real product thinking happens. At this stage, you’re figuring out what the product should do, not how it should look. Low‑fidelity wireframes help you work through the “bones” of the experience:
- Core user flows — Map out what a user does, step-by-step.
- Edge cases and error states — Note what happens when things go wrong.
- Structure and navigation — Show how screens connect and how people move through the product.
- Content hierarchy — Decide what matters most on each screen.
Wireframes keep the conversation focused on logic and clarity, long before polish enters the picture.
Step 2: Speed up with Balsamiq AI
If you’re starting from a rough idea, a text description, or even a screenshot, Balsamiq AI can give you a quick head start. Features like text‑to‑wireframe and image‑to‑wireframe generate a first‑draft layout in seconds. You get something on the screen right away, which makes it easier to start shaping the idea, adjusting the flow, and working toward a version the team can react to.
Step 3: Review with the team
Before you add interactivity, get eyes on your wireframes. This is your main alignment moment. Share your work with stakeholders and developers—export to PDF or PNG, drop it in Slack, or add quick annotations to explain your thinking. Use this time to ask the important questions:
- Does this flow make sense?
- What are we missing?
- What happens if a user abandons this step?
Catching these issues now keeps the next stage smooth and predictable.
Step 4: Build your clickable prototype
Once the thinking is solid and everyone’s aligned, start connecting your screens. Balsamiq’s prototyping features let you add links between elements and set up simple interaction points. This turns your wireframes into a flow someone can actually click through—perfect for user testing, stakeholder walkthroughs, and developer handoff.
Step 5: Hand off to developers (or AI tools)
Once your prototype is validated, it becomes your working spec. Share it with your engineering team or connect it to your AI coding tools through the Balsamiq MCP server. Tools like Claude, Cursor, and VS Code can read your wireframes directly, which means they generate code, user stories, and QA plans that line up with the decisions you’ve already made. The thinking is baked in, so the output stays true to your vision.
Why prototyping is your best defense against rework
Skipping the prototyping phase can feel like a shortcut. In practice, moving straight from an idea to code—or even to polished design—usually creates more work later. When a team starts building before the logic is visible, they often end up refining the wrong thing.
Prototyping is the thinking layer of product development. It’s where you make the decisions that keep the rest of the process smooth. Without it, a few familiar problems tend to show up:
- The imagination gap — A written description means one thing to a PM and something else to a developer. Without a shared visual, those interpretations rarely match.
- Late‑stage discoveries — Edge cases, missing states, and logic gaps often appear only after the build has started. A missing “Back” button is easy to fix in a wireframe and painful to fix in a codebase.
- The “now I see it” moment — Stakeholders give clearer feedback when they can react to something concrete. Seeing a flow for the first time often changes their understanding of what they actually need.
Prototyping gets everyone aligned early. It turns “I think I get it” into “Yes, build exactly this,” long before anyone writes a line of code.
Prototyping tips to save you time
The goal of a prototype is to answer questions, not to create a masterpiece. These simple habits help you move quickly while keeping the quality high:
- Keep visuals low‑fi on purpose. Rough wireframes make it clear the work is still in progress, which encourages honest, structural feedback instead of comments about colors or spacing.
- Don’t skip the error states. Designing only the happy path hides the real complexity. A few minutes spent mapping failed searches, empty states, or incomplete forms can save hours later.
- Test with real users early. You don’t need a full study. Showing your prototype to even two or three people will surface most of the big issues before you commit to code.
- Label your screens clearly. A good prototype should stand on its own. Clear titles and simple annotations help stakeholders and developers follow the flow without extra explanation.
- Iterate the wireframe, not the prototype. It’s much faster to adjust structure in a low‑fi sketch than to rewire a complex clickable flow. Make the big decisions early so the interactive version stays stable. Plus, you’ll save on AI credits this way too.
These small habits keep your process lightweight and help you avoid the kind of rework that slows teams down.
Ready to prototype the right way?
Prototyping gives you the clarity you need to turn a rough idea into something real. When you do the thinking work early, the rest of the process moves faster and with far fewer surprises. You’re no longer guessing—you’re building on a solid foundation.
Whether you’re sketching a small feature or planning a full redesign, the goal is the same: surface the important questions before you commit to the build.
The best time to start is while the idea is still fresh. Open Balsamiq, drop a few components on the canvas, and see where the flow takes you.